The concept of sources in OsEngine.

Every robot in OsEngine receives market information directly from the exchange and through so-called sources. The work through sources is considered a priority, as this simplifies the code writing and eliminates various problems. In today's post, we will discuss what these sources are.
Additionally, each data source has not only its own data types and order processing methods but also its own visual interfaces, which we must consider in the mini-series of articles "Sources."
Looking at the overall data scheme that the robot receives and sees, we are here:
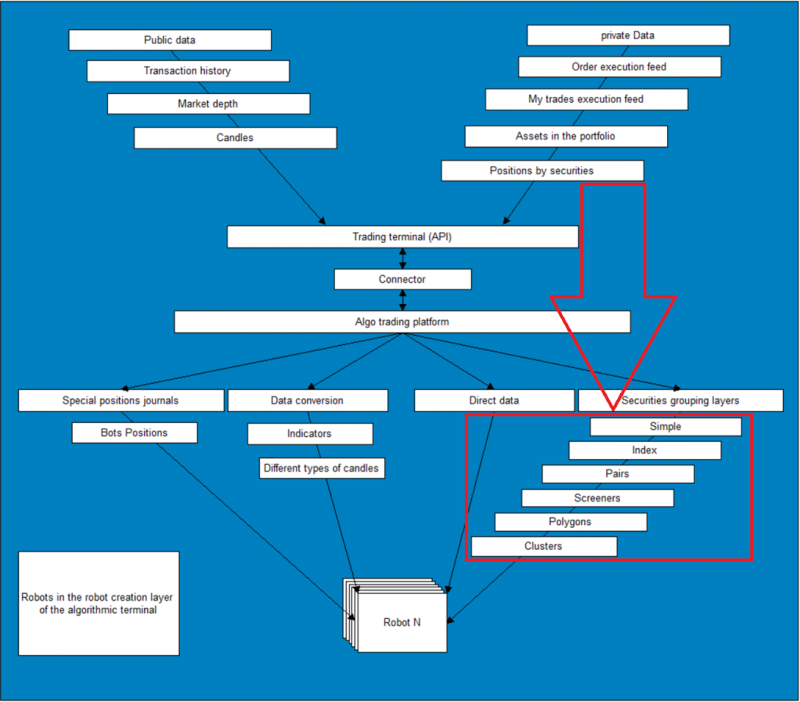
Brief description of sources:
1. BotTabSimple - the basic and largest data source of OsEngine, which allows obtaining information on a specific security and conducting trading operations on it. All other sources are based on it.
2. BotTabIndex - a source for creating custom indexes, grouping and weighting data on different securities together.
3. BotTabPair - a source for trading pairs of instruments.
4. BotTabScreener - a source for trading an unlimited set of instruments. By tens or hundreds. The logic of the source is designed for processing data on different instruments using a single code.
5. BotTabPolygon - a source for trading currency (triangular) arbitrage.
6. BotTabCluster - a source for trading based on horizontal volumes.
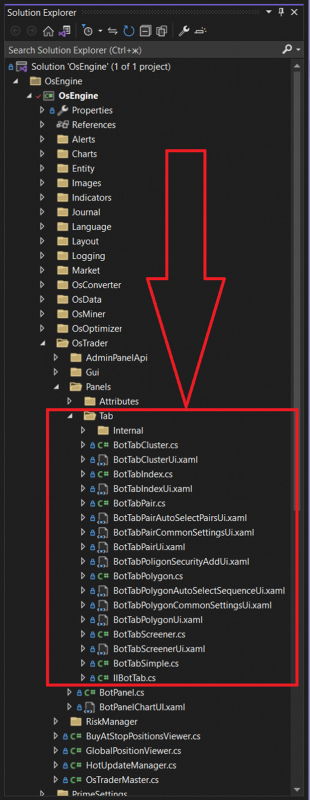
Where are the sources in the source code?
In the project, all sources are located in the following place:
Where to see an example of creating all sources in one robot?
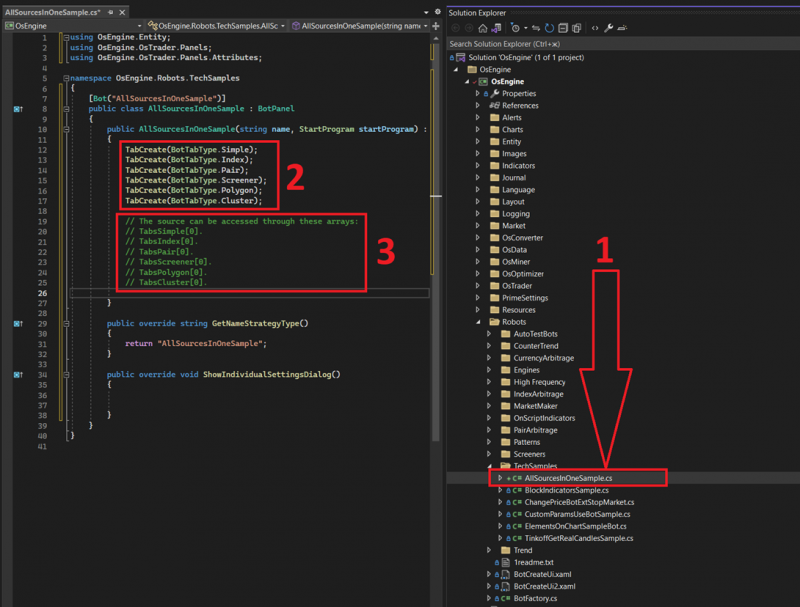
1. The location of the robot class in the project.
2. This is how we create all types of sources in the project one by one.
3. And you can access them from the code. Through the corresponding arrays with meaningful names. Put a dot, and you have access to the functionality of subscribing to events, placing orders, and more.
Create this robot in OsEngine.
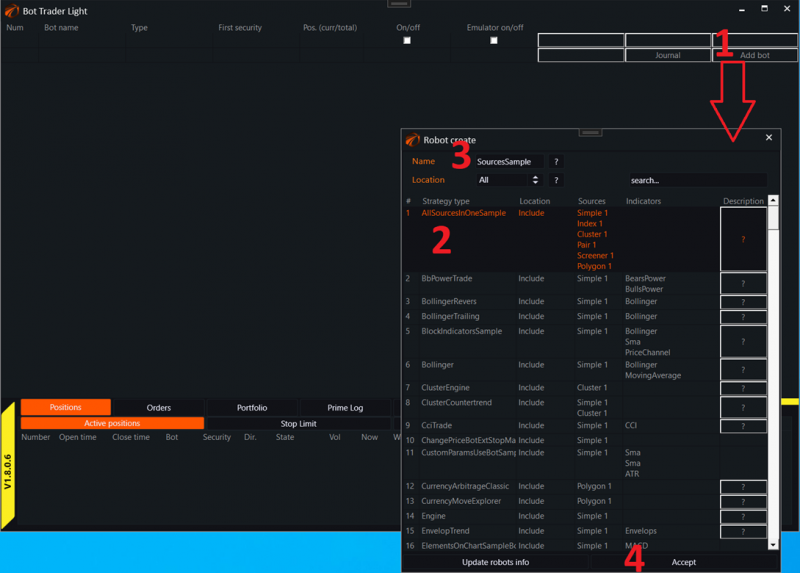
1. Click the create robot button in the Trader Light window.
2. Choose the robot AllSourcesInOneSample.
3. Give it a name.
4. Click the accept button.
How to switch between sources in the visual interface if the robot has many of them?
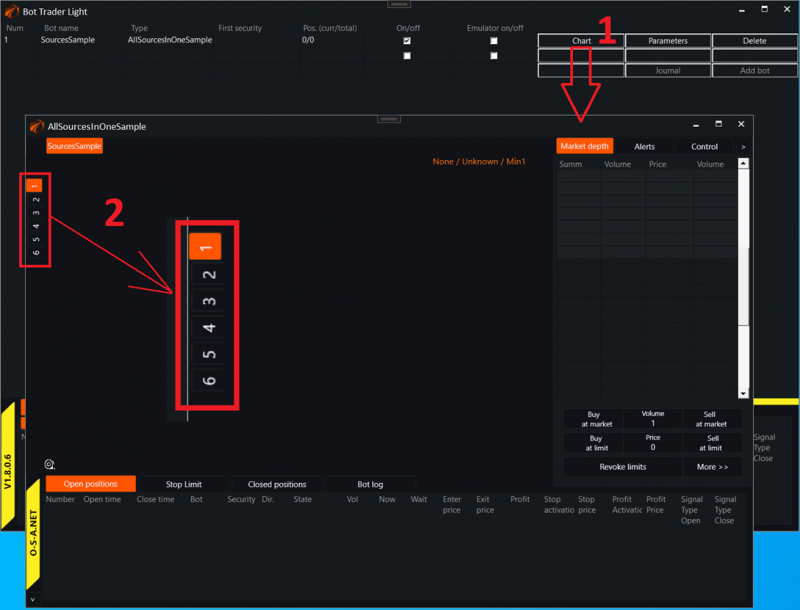
1. In the previously created robot, click the Chart button and bring up its control window.
2. On the left, you will see switches for sources. They will be arranged from top to bottom in the order of their creation in the source code. That is, in this case:
a. Simple.
b. Index.
c. Pair.
d. Screener.
e. Polygon.
f. Cluster.
Each of these sources has its own visual interface and customization methods. Read more about this through the links provided at the beginning of the article.