Ready robot for classic currency arbitrage.

OsEngine has a built-in robot for classic (triangular) currency arbitrage. It's called CurrencyArbitrageClassic. In this post, we will take a look at the procedure for creating it, its parameters, its logic, and also examine its source code.
1. Creating a robot for classic currency arbitrage.
To create an instance of the robot, as in other cases, you will need to open the lightweight trading interface and click the «Add bot» button:
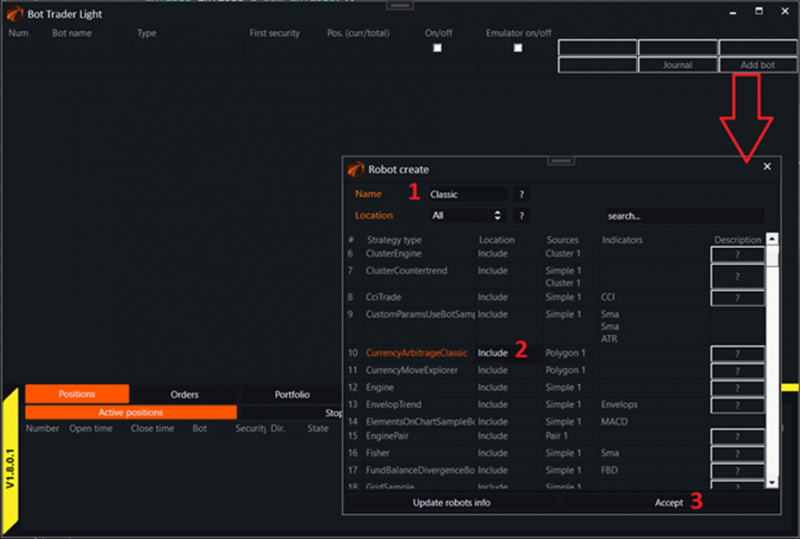
1. Enter a unique name for the robot.
2. Select the type of robot. In this case, it is CurrencyArbitrageClassic. You need to click on it with the left mouse button to highlight the robot's name in orange.
3. Click the «Accept» button.
2. Connecting sequences in trading.
Connecting to the server and creating sequences of instrument pairs for currency arbitrage are described in this article and are fully applicable to this robot: link
To continue, you must:
1. Connect to the server.
2. Set up the instrument pairs for trading.
Recommended initial settings:
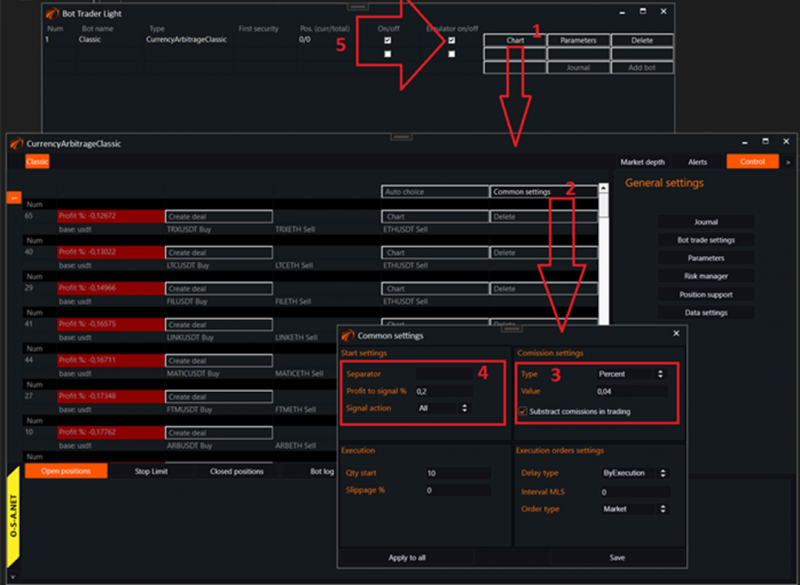
1. Access the robot's interface.
2. Access the general settings.
3. Recommended settings for the minimum specified commission. Even if you pay it in another currency.
4. Recommended minimum settings for the generated signal so that the robot sees them.
5. Note that the «Emulator» mode is enabled. It's not necessary to start live trading right away until you have fully understood everything.
3. Robot parameters.
Accessed from the lightweight trading interface by clicking the «Parameters» button:
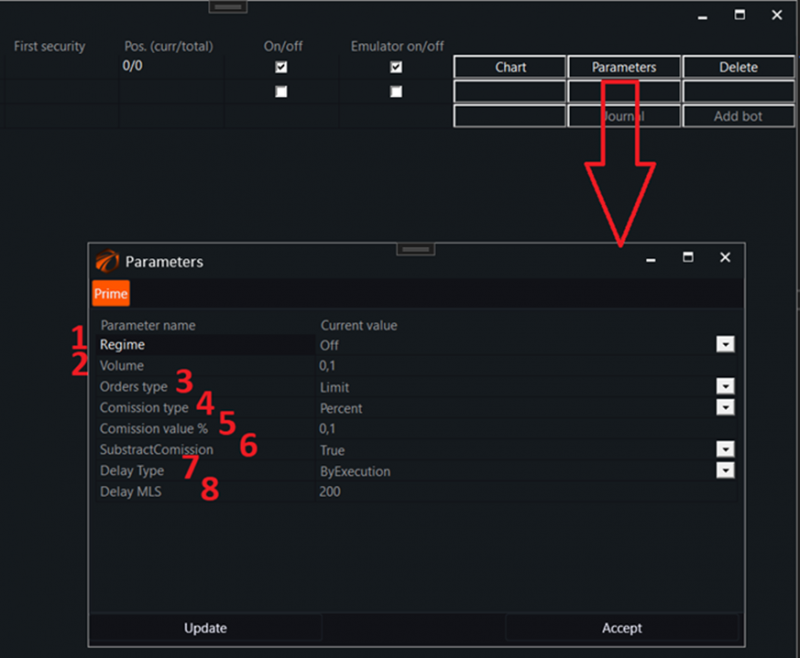
1. General mode. On/Off.
2. Initial volume to be used.
3. Type of order to be used.
• Limit.
• Market.
4. Type of commission to be used.
• None - absent.
• Percent - in percentages.
5. Size of the commission to be used if the commission type is in percentages.
6. Whether to subtract the commission from the volumes to be traded after the first deal.
7. Type of delay between orders.
8. Delay in milliseconds to be used if the corresponding type of delay is selected.
4. How the robot works and what it does.
Once a signal is received from the BotTabPolygon that the profit has exceeded the signal value, the robot begins the operation of placing orders for the pair, according to the settings.
5. Review of the robot's code.
The source code of the robot is located within the project here:
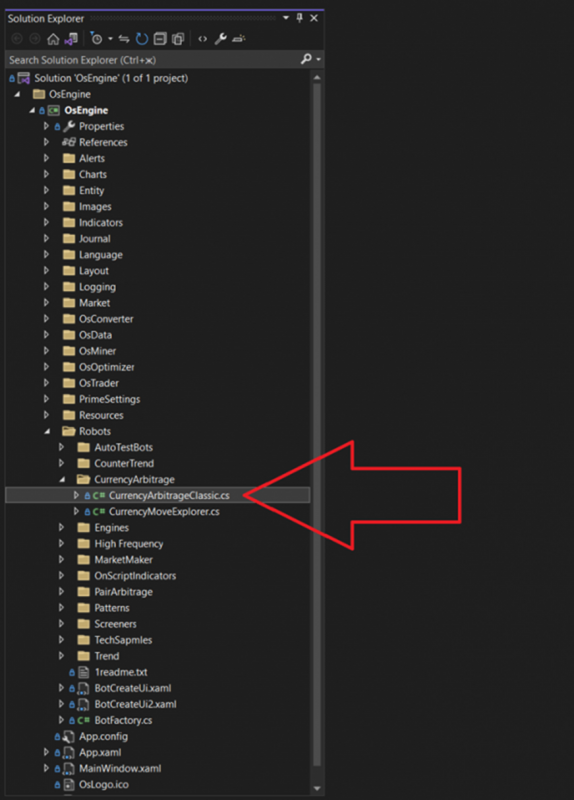
Link to this robot on GitHub.
The entire code consists of 113 lines, mainly composed of service code.
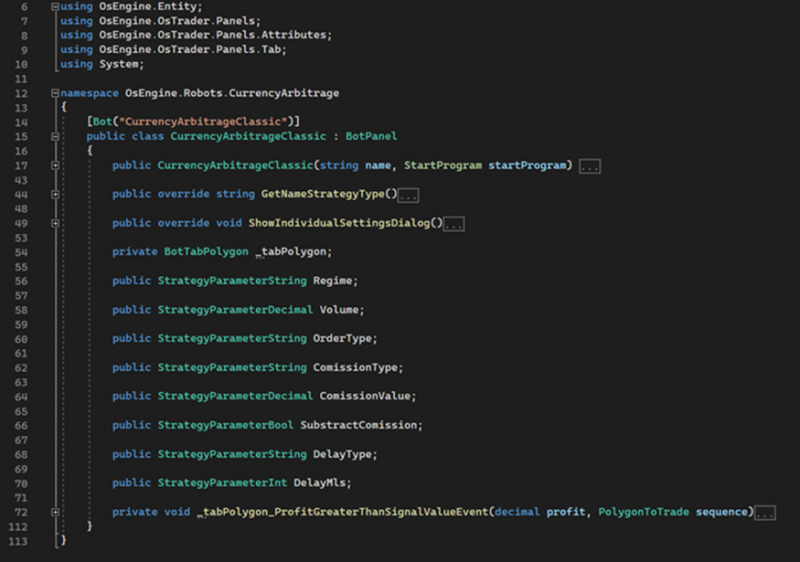
Usings are standard for robots in OsEngine.
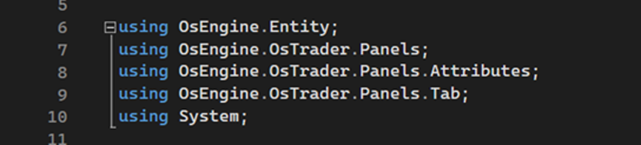
Fields:
1. Source of BotTabPolygon, where the signals are calculated, sequence settings, and trading logic.
2. Parameters seen above in the interface.
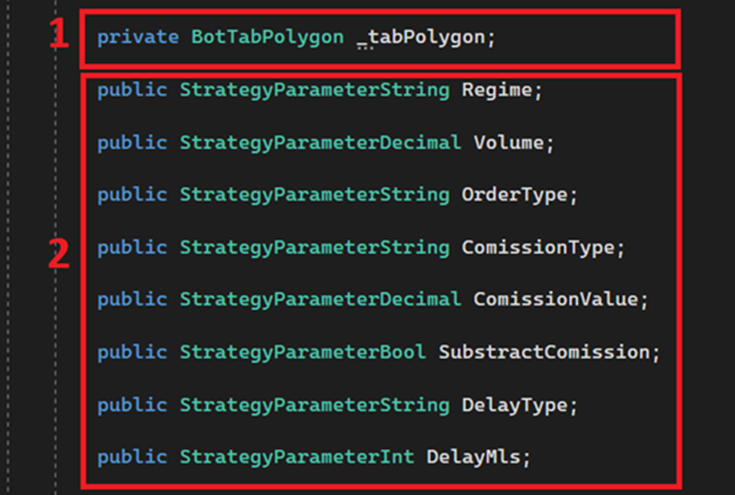
Constructor:
1. Creating a source for currency arbitrage and saving it as a class field.
2. Subscribing to the event of exceeding the profit signal value within the sequence.
3. Creating parameters for the robot.
Logic:
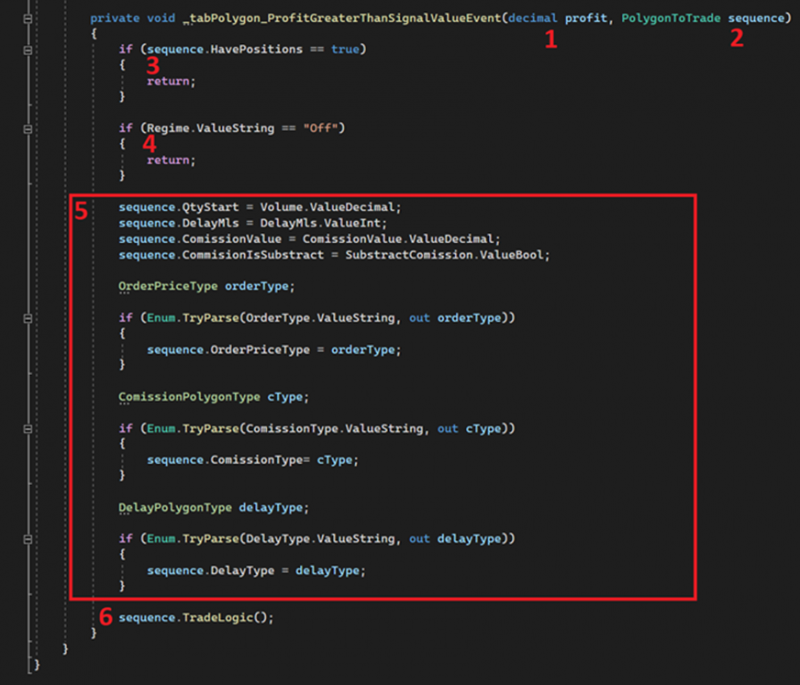
1. First parameter received: Profit for the current pair as a decimal.
2. Second parameter received: the sequence itself. A class responsible for calculating the profitability of the pair and containing trading logic.
3. If there are any positions for the pair, exit the method.
4. If the robot mode is set to Off, exit the method.
5. This large block copies the robot's settings to the pair to ensure everything goes smoothly. It could have been done without it, leaving everything to the pair's settings, but at the time of writing the code, it seemed more convenient this way.
6. Call the method for trading the pair.
If you have any difficulties or questions, please write to the support chat. Link