OsEngine. OsData 2.0

Hello. In this article, we will discuss the basic interface of OsEngine - «OsData». Thanks to it, users have the ability to download and store historical data of candles, ticks, and order book snapshots using connectors.
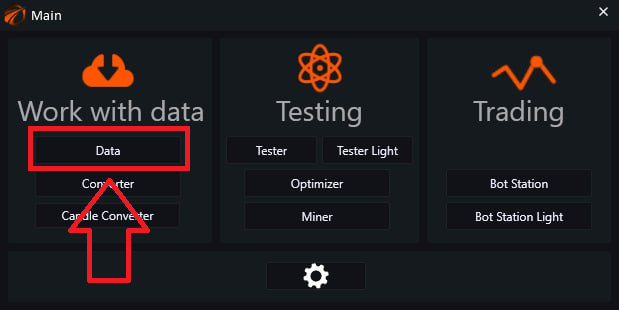
To get started, run the exe file with the platform:

You will land on the main menu where you click on the «Data» button.
The settings window will open:
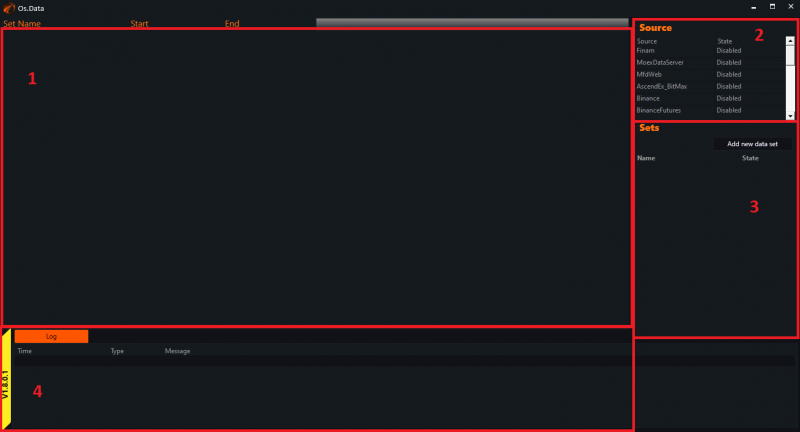
- «Main Window» - a window for viewing the desired data.
- «Source» - a list of connectors from which you can obtain exchange data.
- «Sets» - a panel for adding instruments and creating custom sets.
- «Log» - logging panel.
First, choose the source from which we will download the data.
To connect, find the desired exchange and double-click its name with the left mouse button.
As an example, let's choose Binance.
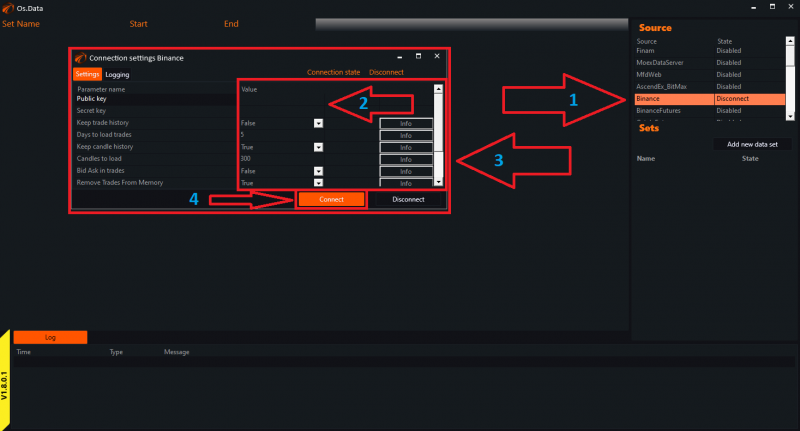
- Double-click on Binance.
- In the opened window, enter your public and secret API keys.
- Enter the necessary data and settings in the opened window (individually for the exchange and user).
- Click on «Connect».
Close the settings window.
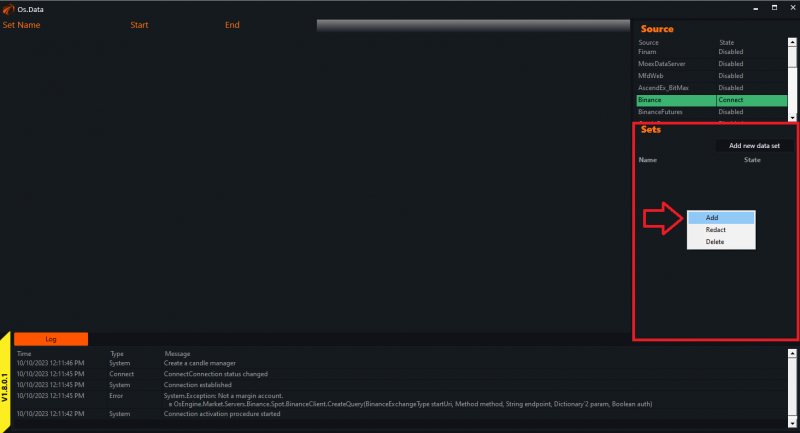
The green color indicates that the connection is active and now it is necessary to create a network. Click on the «Add new data set» button.
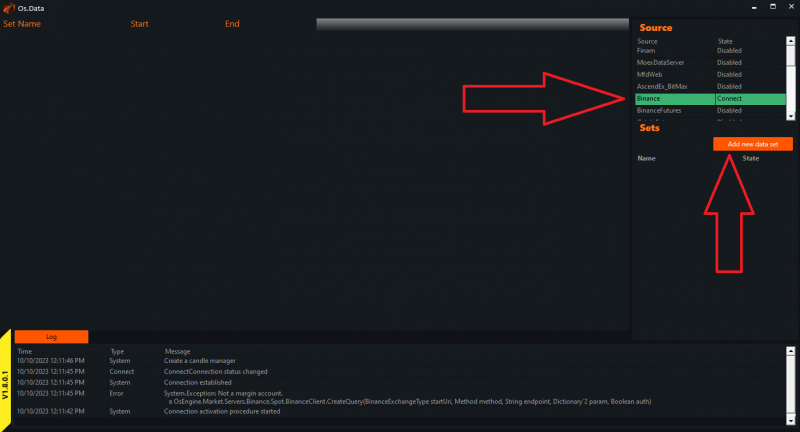
Alternatively, on the «Sets» panel, right-click and select «Add».
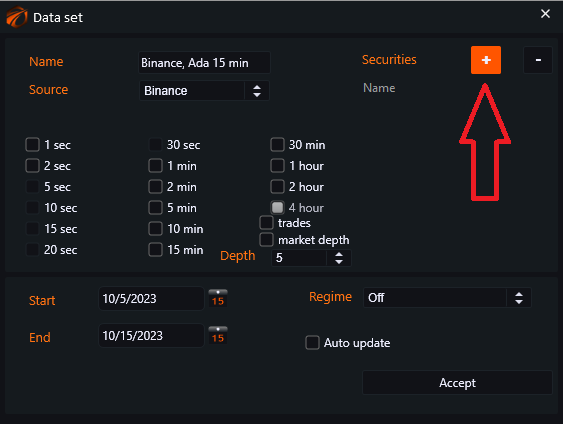
The «Data set» window will open:
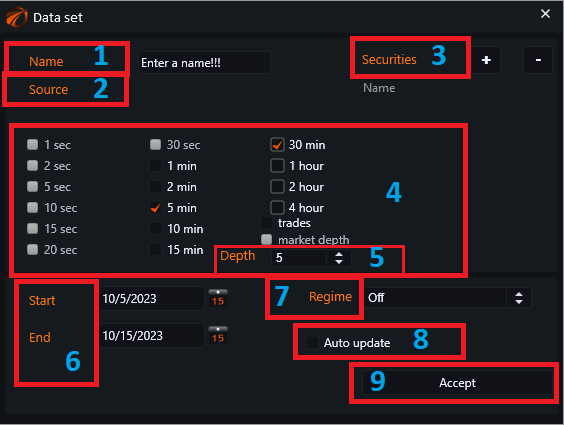
- «Name» - the name of the data set.
- «Source» - the source from which we download the data.
- «Securities» - buttons for adding and deleting instruments.
- «Timeframe» - the period for which we want the data (you can include multiple timeframes, but it will increase the download time and computer load).
- «Depth» - order book depth.
- «Start/And» - the start date for downloading historical data.
- «Regime» - enabling or disabling the download.
- «Auto update» - updates the received data every minute (if you are unsure how to use it, it is better not to touch it!).
- «Accept» - confirmation button.
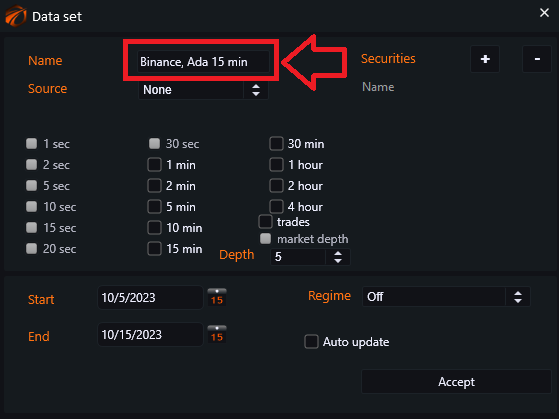
Let's create a new data set.
Enter the name of our dataset, making sure to provide enough information for you to understand which exchange and data you downloaded.
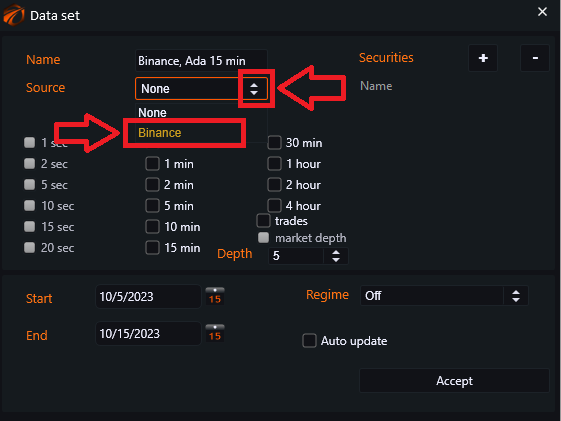
In the «Source» field, click on the arrows and select «Binance».
Using the «+» button, add the instruments of interest:
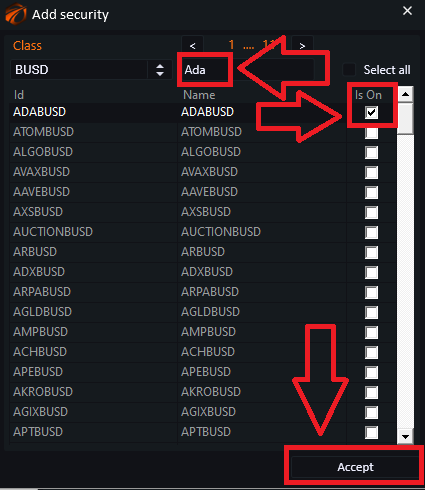
Next, click on the arrows and select the desired class.
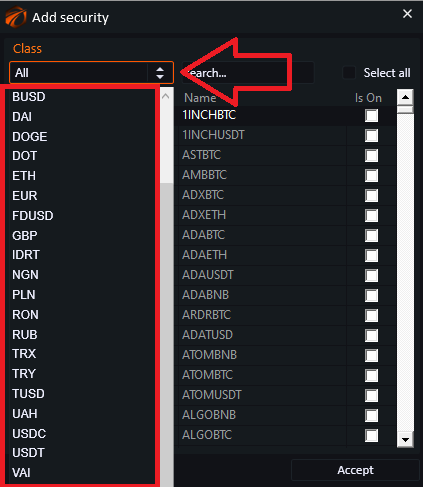
- For convenience and quick search of the desired instrument, enter its name in the search window.
- Check the checkbox (you can select multiple instruments at once).
- Click on «Accept».
You can add multiple datasets in this way. Each time, click on the «+» button. The added datasets will be displayed below each other. Checkmark the time frames that you need (you can select one or multiple):
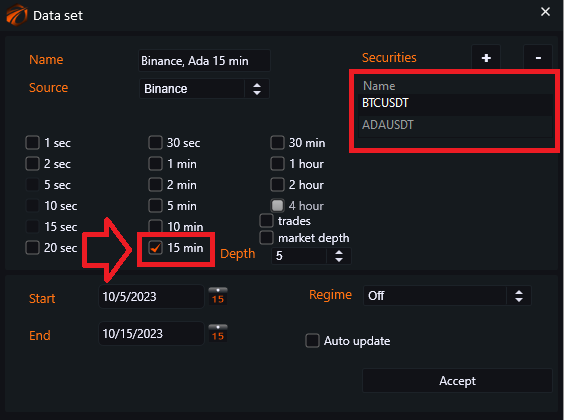
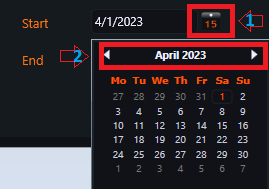
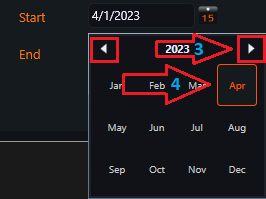
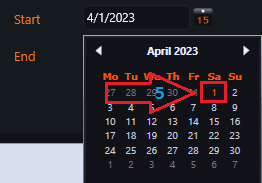
Set the period for which we will download the data (from a few days to several years):
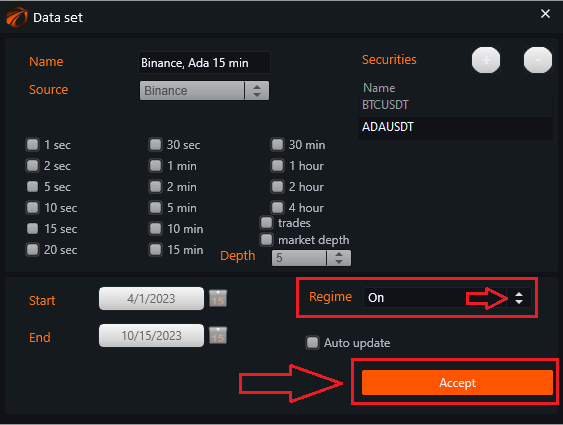
«Regime» - saves all settings and prepares for download:
- Click on the arrows.
- Select «On».
- Click on the «Accept» button and wait for the download to finish. The download time depends on the amount of data being downloaded and the power of your computer.
The data has started downloading.
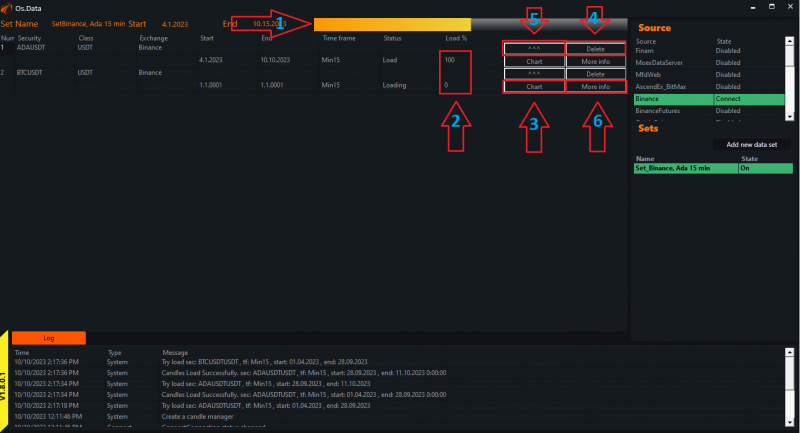
- A scale showing the progress of the overall download process.
- You can also view the percentage of loading for each coin separately.
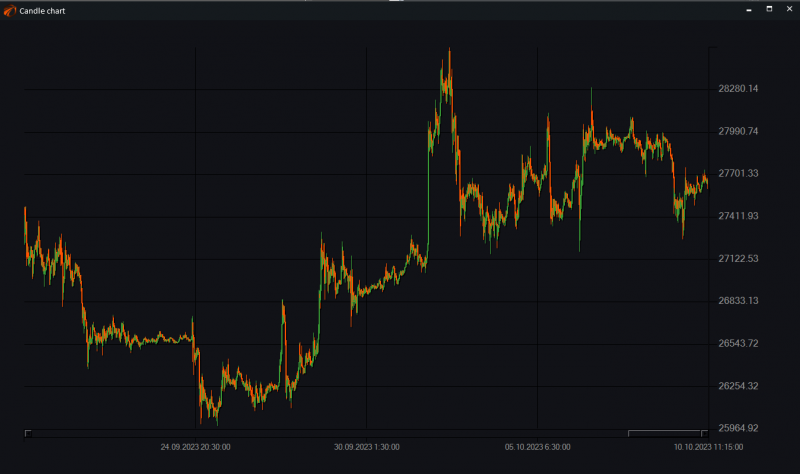
- «Chart» - when clicked, displays a window with a graph:
- «Delete» - allows you to delete unnecessary instruments.
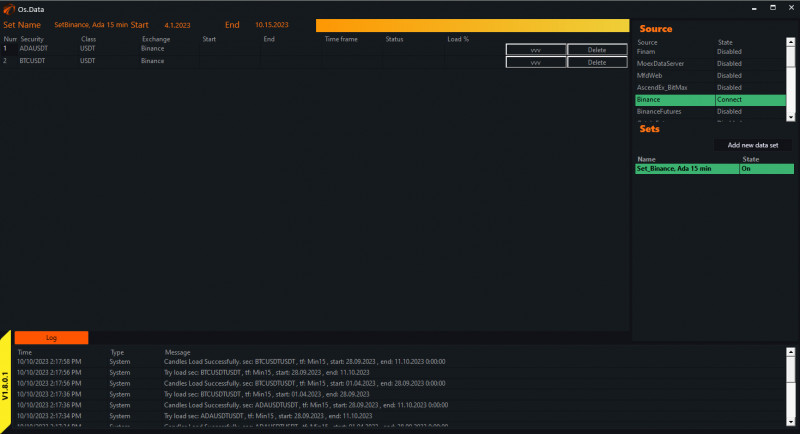
- «^^^» - used to collapse rows. After clicking, we get the following view:
- «More info» - visual view of the data cache. This helps to solve the issue of corrupted data. Each data set consists of multiple parts requested from the source, and you can view them here:
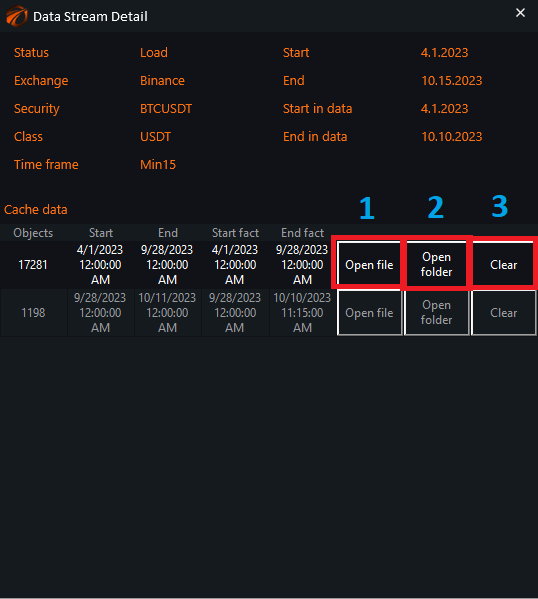
- «Open file» - open the cache file and visually inspect it.
- «Open folder» - open the folder storing all the data chunks.
- «Clear» - clear a specific data chunk if any issues are detected.
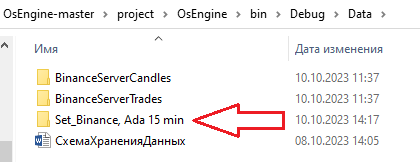
The downloaded data is stored in the «Data» folder, located here.
Wishing you successful tests and profitable trading!
If something didn't work out or if you have any questions, please feel free to reach out to our support chat.