Optimizer in OsEngine. Simple parameter sweep.

The optimization module allows you to perform several types of strategy parameter optimization, including "simple parameter sweep" and Walk-Forward testing. In this article, we will talk about the first one. About simple parameter sweep.
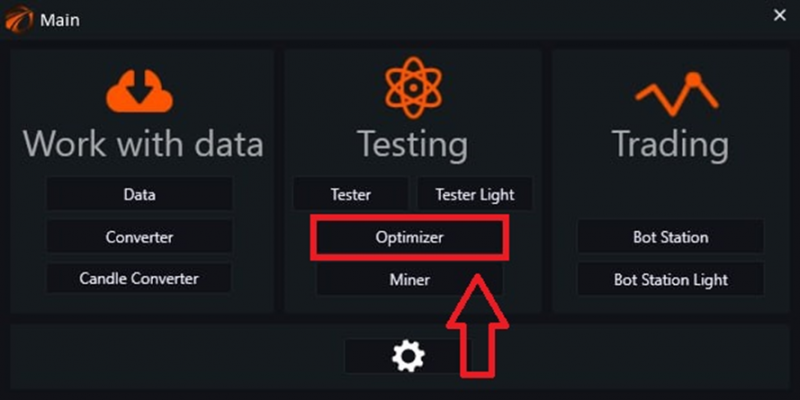
To start working, launch the exe file with the platform:

We get to the main menu, choose "Optimizer":
The Optimizer window opens, where we will work:
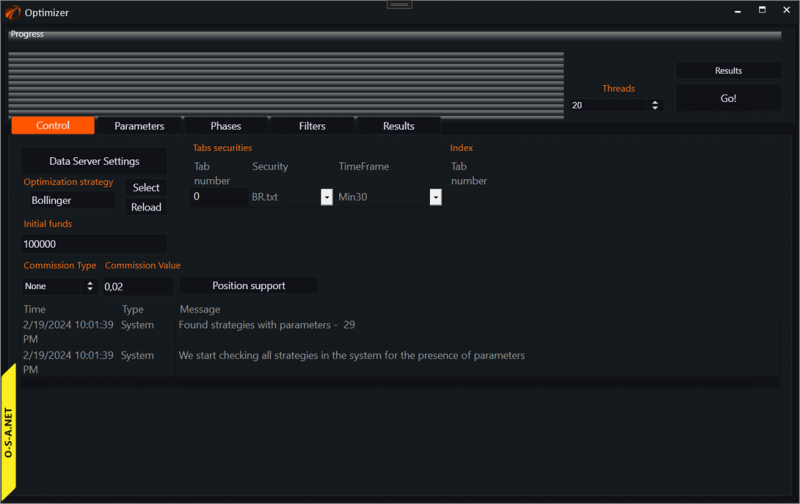
1. Set up the data source.
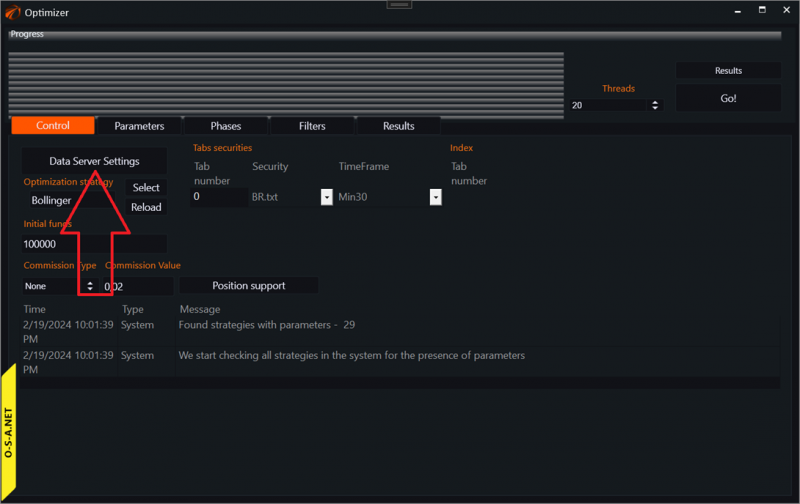
The first thing to do is to configure the data source, click on the "Data Server Settings" button:
And we go to the data server window:
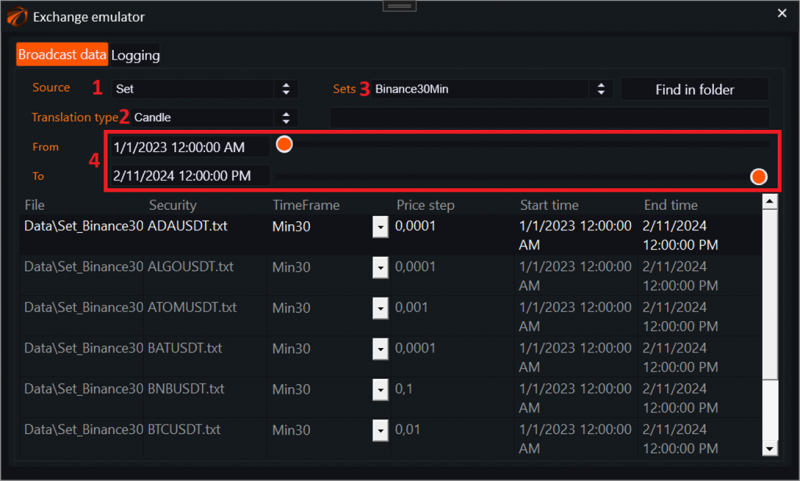
1. Select the type of source. In this case, it is a dataset that was previously downloaded through OsData.
2. Select the type of data transmission, in this case, it is candles.
3. Select the dataset itself.
4. Configure the data transmission time.
2. Choose a trading robot.
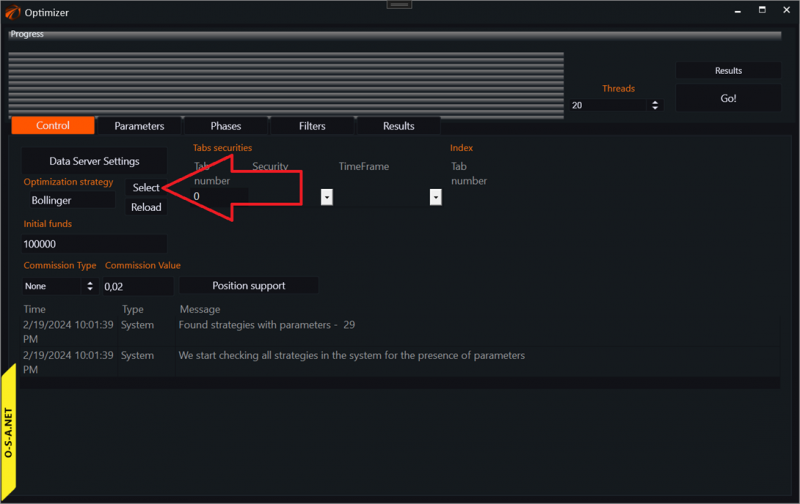
In the main optimizer window, click on the Select button:
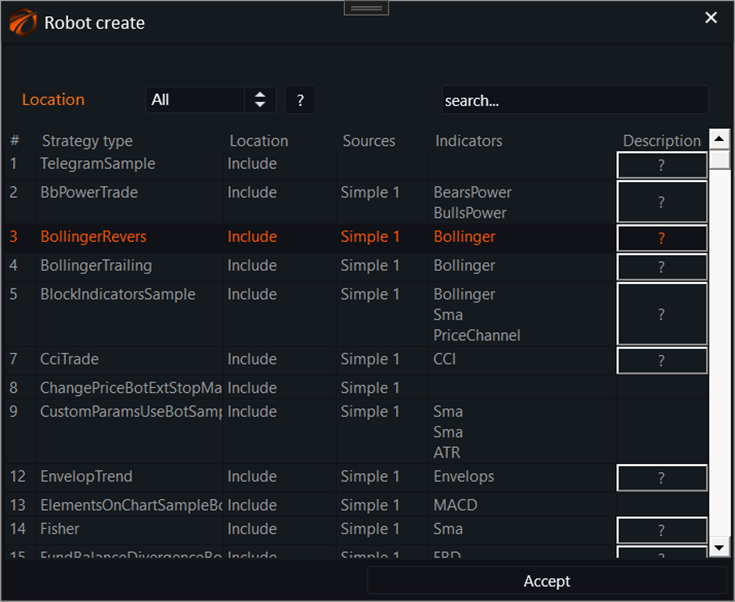
And select the trading robot that you want to optimize:
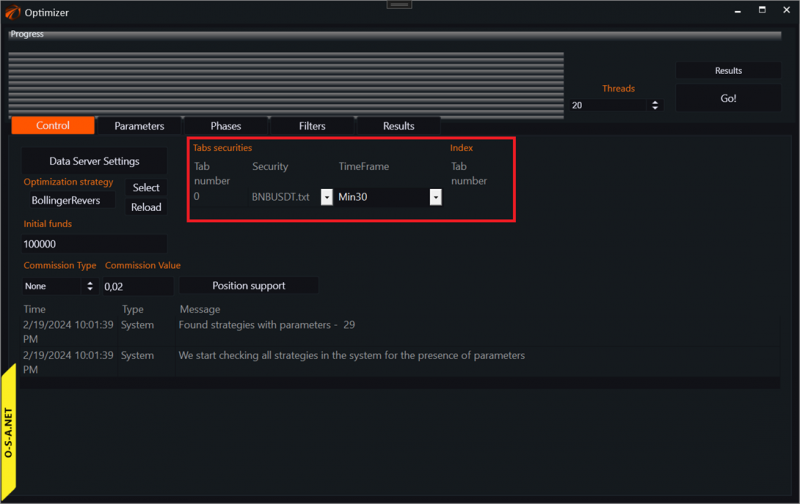
3. Choose the instrument on which the optimization will take place.
This is done in the main optimizer window:
4. Set the commission for transactions.
This is done in the main optimizer window:
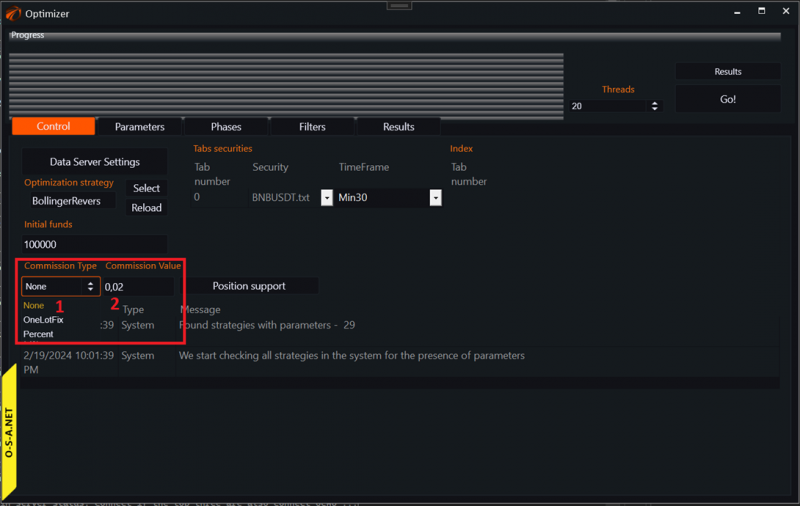
1. Select the type of commission.
a. None – disabled.
b. OneLotFix – for one contract.
c. Percent – as a percentage of the transaction amount.
2. Set the commission value.
5. Configure position maintenance in the robot.
This is done in the main optimizer window:
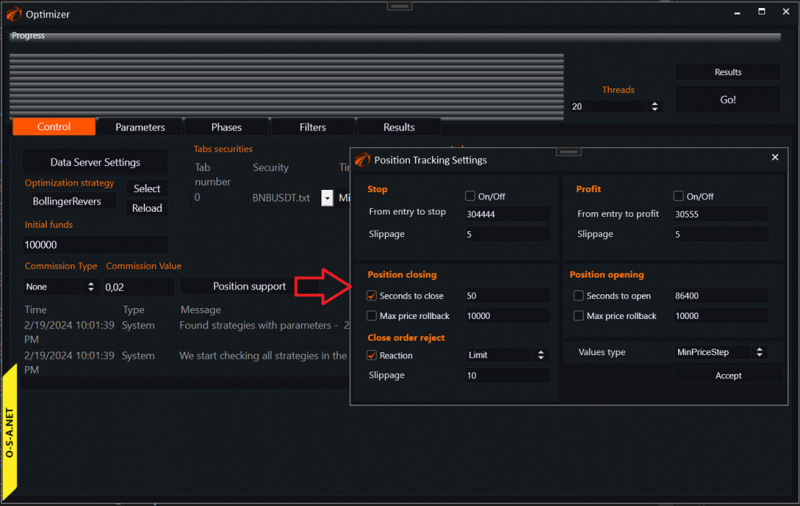
Link to an explanation of settings in the window.
6. Set the parameters to be optimized.
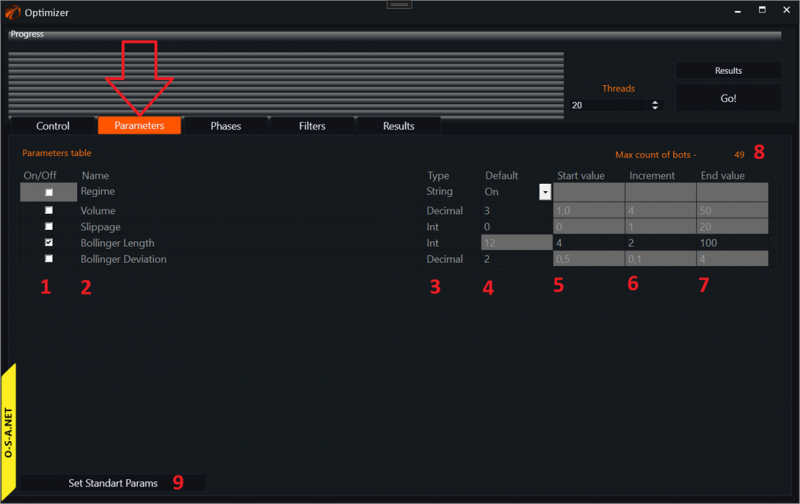
1. Column enabling and disabling parameters for optimization.
2. Parameter name.
3. Type of parameter to be optimized.
4. Default value. Used if the parameter is not included in the list of optimized parameters.
5. Start value for optimization.
6. Increment step value.
7. Final parameter value.
8. Number of optimizer passes to go through all possible parameter values.
9. Reset button to reset parameter values to their initial values as written in the robot's source code.
7. Set up the optimization scheme.
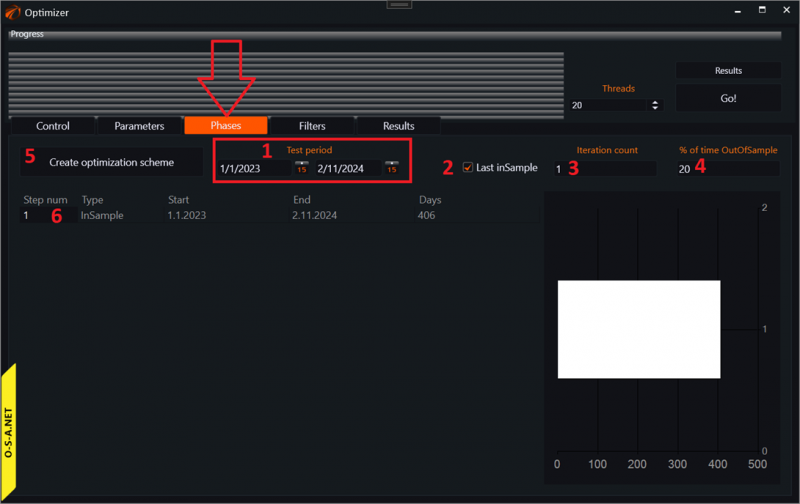
1. Select the period for optimization. By default, everything available.
2. For the type of optimization "simple parameter sweep", make sure to check this box.
3. For the type of optimization "simple parameter sweep", make sure to enter the number 1.
4. For the type of optimization "simple parameter sweep", this value is not relevant.
5. Click the "create optimization scheme" button after previous settings.
6. For the type of optimization "simple parameter sweep", there should be only one period in the optimization stages table.
8. Set up filters for the results.
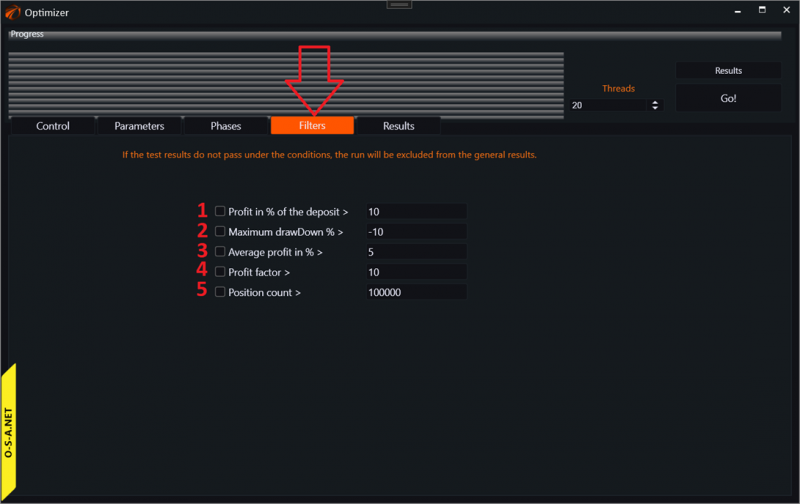
1. Show a pass in the final sample only if the final profit on the deposit in percentage is greater than the specified number.
2. Show a pass in the final sample only if the final maximum drawdown does not exceed the specified number.
3. Show a pass in the final sample only if the average profit per trade is higher than the specified number.
4. Show a pass in the final sample only if the profit factor is higher than the specified number.
5. Show a pass in the final sample only if the number of transactions is greater than the specified number.
9. Start the optimizer.
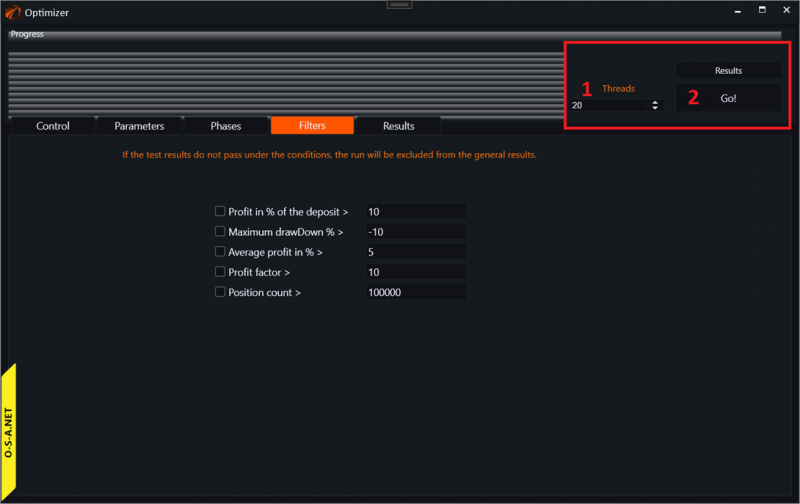
1. Number of threads to be involved during operation.
2. Click the start button.
10. Viewing results.
For the "simple parameter sweep" optimization type, only one page on the results tab is of interest to us. Here it is:
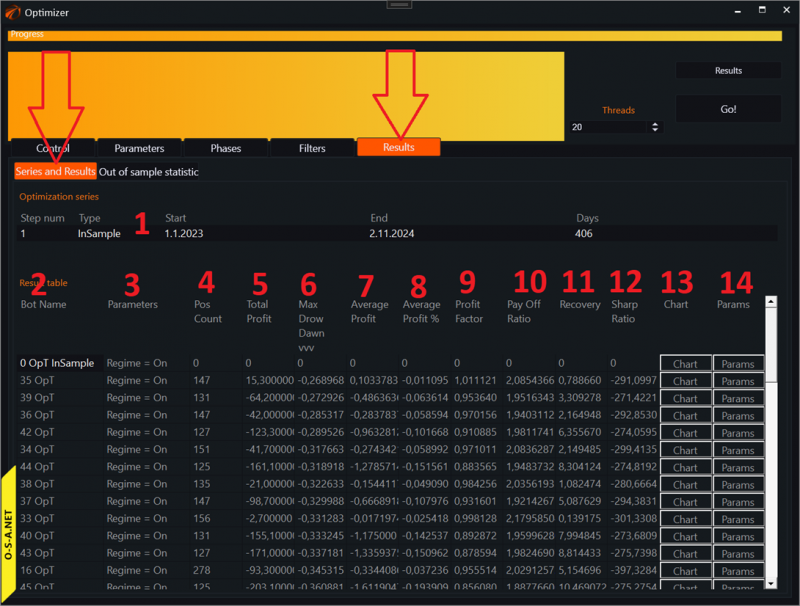
Here we see all the variations of the robot, launched with different parameters on the same time frame.
1. The time frame on which we conducted the optimization.
2. The robot's launch number.
3. The robot's parameters. If you hover over this field with the mouse pointer, you will see a list of parameters for the robot.
4. Number of positions. Left-click – sort by column.
5. Final absolute profit. Left-click – sort by column.
6. Maximum drawdown. Left-click – sort by column.
7. Average profit per 1 contract in absolute terms. Left-click – sort by column.
8. Average profit per 1 contract in percentages. Left-click – sort by column.
9. Profit factor. Left-click – sort by column.
10. Pay Off Ratio. Left-click – sort by column.
11. Recovery. Left-click – sort by column.
12. Sharp Ratio. Left-click – sort by column.
13. Chart – open the chart of this robot with the current parameters. ATTENTION. To do this, you will need to wait, as testing operations need to be conducted for chart opening.
14. Params – open the window for setting robot parameters.
11. Opening results of the robot with specific parameters.
By clicking the Chart button, you will access the robot from the line with specific parameters. As the robot opens, it will be retested, so you will have to wait a little:
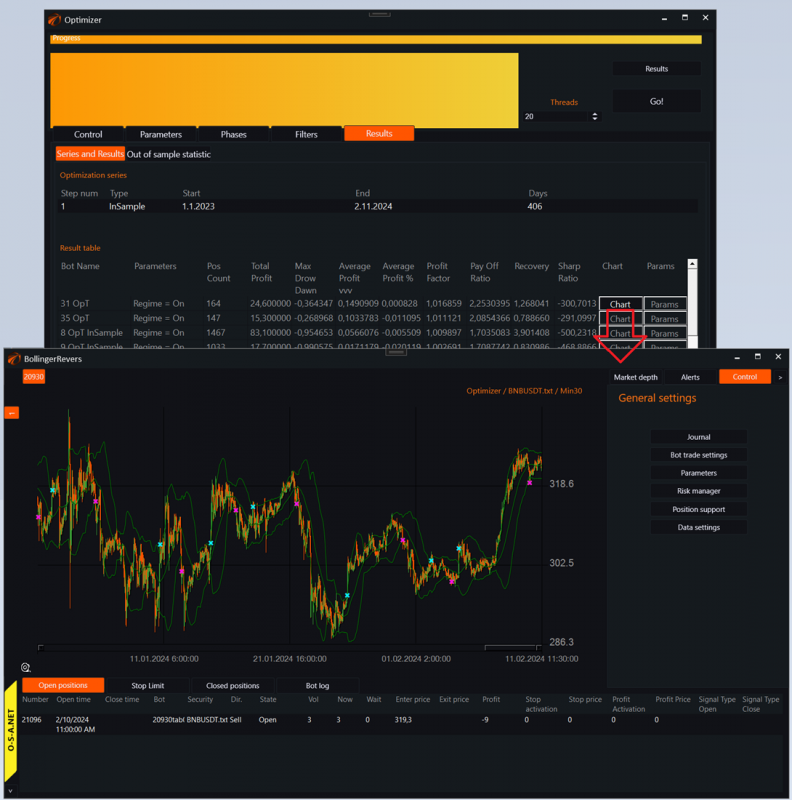
Here you can also open the standard log, see where exactly the robot entered and exited positions.
If something doesn't work out or if you have any questions, please write in the support chat, link.