Using BotTabScreener in Robot Code.

Let's look at an example of how to use BotTabScreener to create a robot. In this article, we will write our own screener inspired by a robot that trades channel price breakouts.
First, let's put together a small technical specification.
So, we need a channel price indicator. There is already one available in the program – PriceChannel. A long position is opened when the price crosses above the upper boundary. The exit is made on the reverse signal, i.e., when the price crosses below the lower boundary of the channel. With short positions, things are a bit different. We will enter on a break of the lower boundary, but exit on a trailing stop. All entries and exits will be made using conditional orders.
To start, we will need a number of parameters:
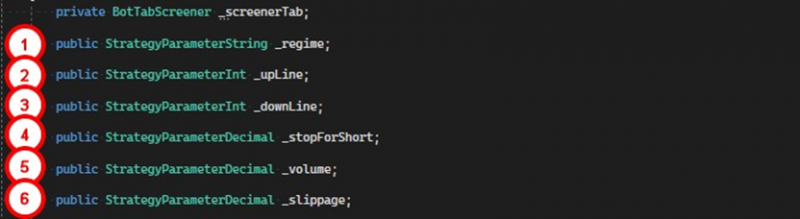
1. Bot operation mode, On/Off, whether it is enabled or disabled.
2. Parameter for setting the length of the upper channel boundary in the indicator.
3. Parameter for setting the length of the lower channel boundary in the indicator.
4. The size of the trailing stop for short positions.
5. The volume for positions.
6. Slippage for conditional orders as a percentage of the activation price.
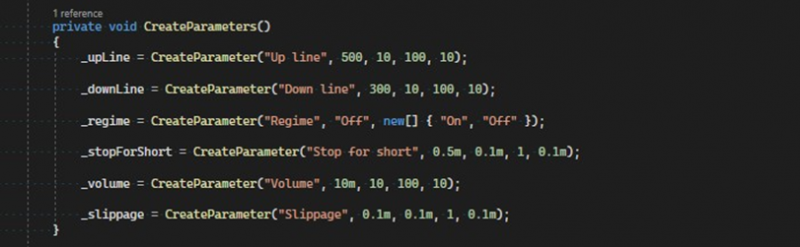
To avoid bloating the constructor, I suggest putting the parameter initialization in a separate method CreateParameters:
Now let's consider the class constructor.

1. Create parameters.
2. Create a Screener tab and save the reference in a variable.
3. Subscribe to the event of adding a simple tab.
4. Subscribe to the event of the completion of the next candle.
5. Subscribe to the event of successful position opening.
6. Create a list of parameters for the indicator.
7. Create an indicator for the screener.
8. Subscribe to the event of strategy parameter changes.
Next, let's take a look at the event handler for adding a simple tab, ScreenerNewTabCreateEvent.
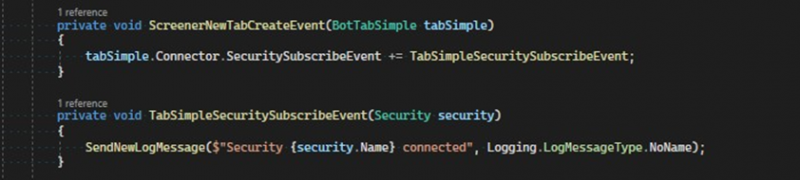
In this method, we can access the simple tab immediately after it is added to the screener. This can be useful, for example, for subscribing to events that are not available in the screener. In our case, we refer to the Connector property and set a handler for the SecuritySubscribeEvent, which will be called when the subscription process for the instrument is complete.
Before moving on to an overview of the core trading logic, let's look at the auxiliary methods.

The CalcPriceSlippageUp method takes the conditional order activation price, calculates, and returns the buy order price, taking slippage into account.

The CalcPriceSlippageDown method takes the conditional order activation price, calculates, and returns the sell order price, taking slippage into account.

The CalcStopForShort method takes the current price, calculates, and returns the stop-loss order activation price for a short position.
Next, let's break down the event handler for the completion of the candle. The ScreenerTabCandleFinishedEvent method is the main place where trading logic is performed, it takes a list of candles and the simple tab in which the event occurred.
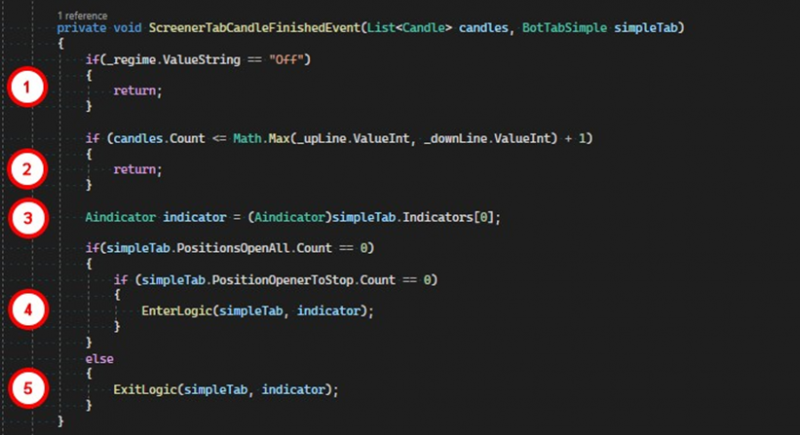
1. If the robot is turned off, exit the method.
2. Check if there are enough candles to form the indicator.
3. Access the indicator. We know that we have only one, so it will be at the zero index.
4. If there are no open positions and no conditional orders in the processed tab, the position opening logic inside the EnterLogic method is executed.
5. If there are open positions, the closing logic is executed in the ExitLogic method.
In the EnterLogic method, conditional orders for buying and selling are created at the indicator boundaries while the above conditions are met. These orders last for the duration of one candle, as the corresponding BuyAtStop and SellAtStop trading methods are used.

1. The activation price for a conditional buy order that corresponds to the upper boundary of the channel.
2. The price for the order including slippage which will be sent to the exchange after the price crosses the upper line of the indicator.
3. Command the tab to create a conditional buy order.
4. The activation price for a conditional sell order that corresponds to the lower boundary of the channel.
5. The price for the order including slippage which will be sent to the exchange after the price crosses the lower line of the indicator.
6. Command the tab to create a conditional sell order.
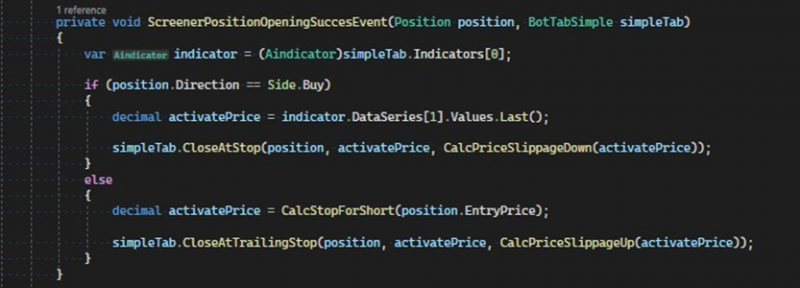
After one of the conditional orders is executed, the other will be canceled by the tab, and the PositionOpeningSuccesEvent event will be triggered. In the ScreenerPositionOpeningSuccesEvent method handler, we determine which position was opened. If it's a purchase, a regular stop is set at the price of the lower boundary of the indicator. If it's a short, a trailing stop is set.
Furthermore, in the event handler for the completion of a candle, the ExitLogic method will be triggered, as we now have an open position.

1. If a long position is open, we reload the stop for the position because the value of the lower boundary of the channel changes, and we need the stop to always correspond to it.
2. If a short position is open, we pull up the trailing stop using the closing price of the last candle for the instrument in the tab. The CloseAtTrailingStop method checks whether the stop needs to be moved. In our case, the stop will only move down, following the price.
Finally, let's consider the last created method PanelParametrsChangeByUser, the event handler for ParametrsChangeByUser:
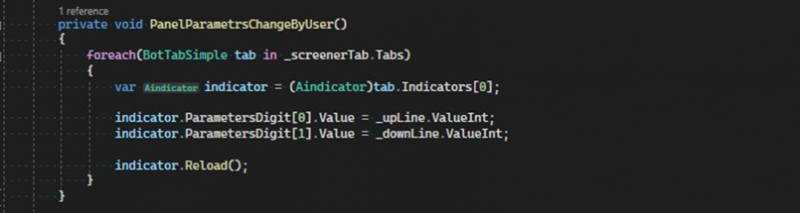
This method will be triggered when the user changes settings in the parameters window. As we know, we have two parameters intended for setting up the indicator. Accordingly, after changing them, we need to change the indicator as well. To do this, we use a loop to go through each simple tab belonging to the screener. We get access to the indicator and set the new values.
The file with the robot's code can be taken from the link.
If you have any difficulties or questions, please write to the support chat. Link