OsData and Tester. Downloading transaction history and running tests on it.

In this article, we will learn how to save transaction history and then run the tester on this type of data.
1. OsData and data download.
Open the OsData interface and connect to the connector from which you want to save the transaction history:

In this case, it is Binance.
Now create a new set and set up:

1. Give the data set a meaningful name.
2. Choose the connector to which you connected.
3. Enable the type of data to download as "Trades". This is the transaction history.
4. Add securities for which you want to download data. If you add BTCUSDT, the number of trades there is so large that downloading a week of such data can take several hours.
5. Set the depth of downloading data.
6. Set the data set to ON mode.
7. Click Accept.
Trades are downloaded very slowly. In addition to the progress bar at the top, you can also see in the log how they are downloaded day by day:

Please be patient with this.
The same goes for data servers for MOEX. Trades are heavy data. Please be patient with the speed of their download.
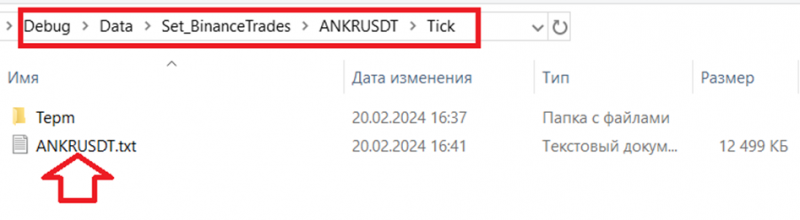
2. Data in the file system.
Next to the OsEngine.exe file, there is a Data folder. Inside, you will find the data set that you created and the transaction history data for a specific security, here:
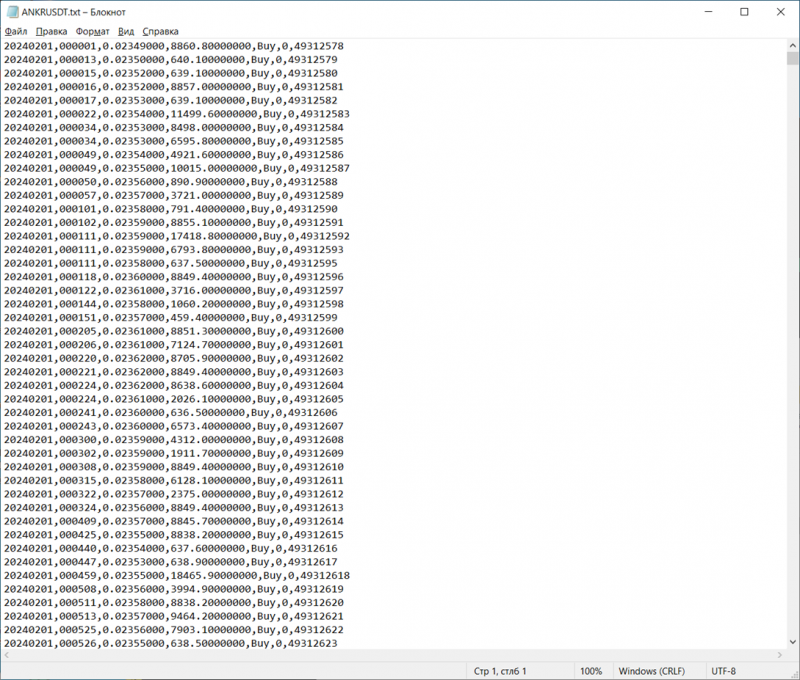
Inside the file is the transaction history itself.
<Date(yyyyMMdd)>,<Time(HHmmss)>,<Price>,<Volume>,<Side>,<Microseconds>,<ID>
3. Tester on transaction history data.
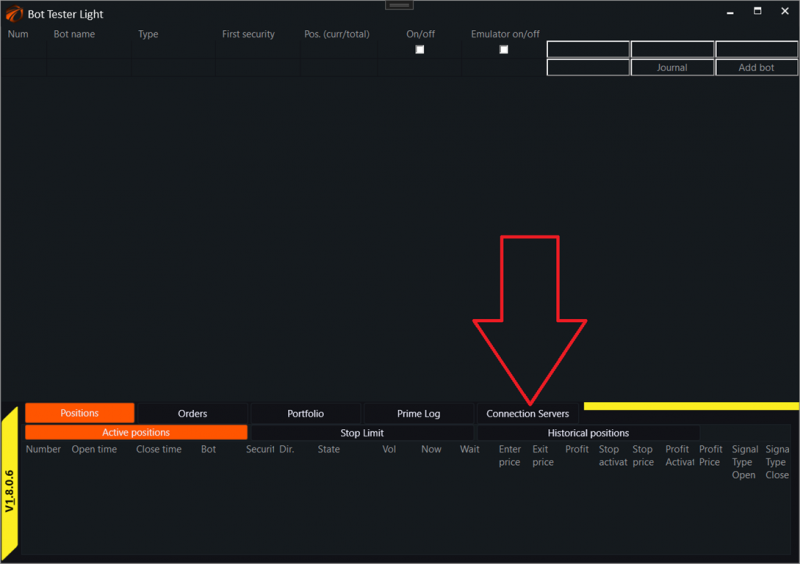
Switch from OsData to Tester:

Connect to the testing core:
And enable our data set:
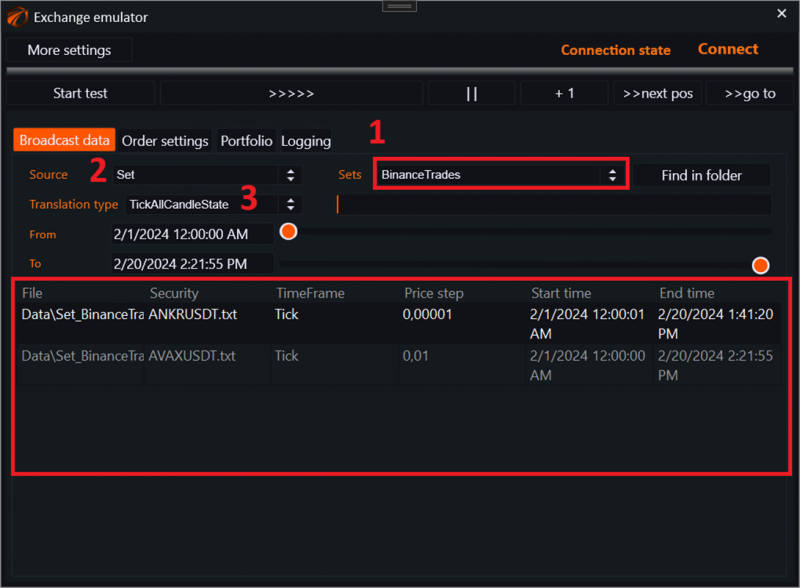
1. Choose the set with transaction historys.
2. Select the data source type - SET.
3. Choose the type of data transmission:
a. TickAllCandleState - all candle changes.
b. TickOnlyReadyCandle - only ready candles.
4. Create a robot and connect to the order book.
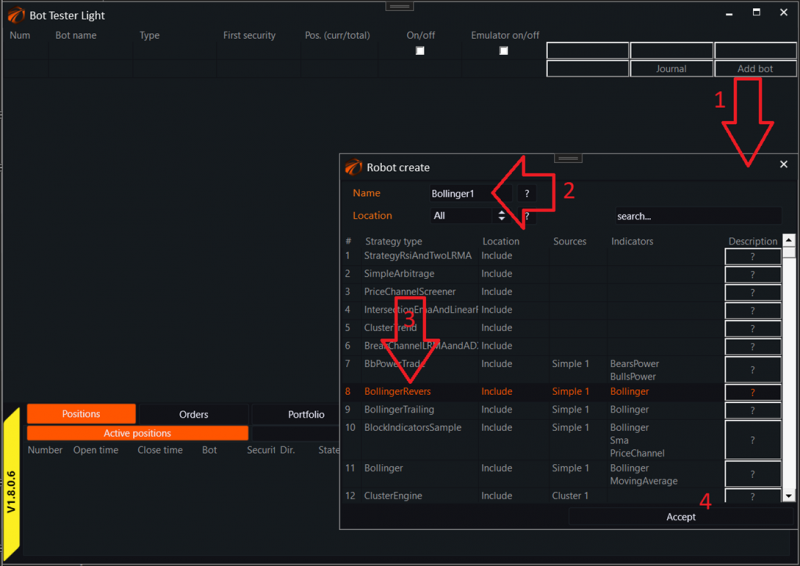
1. Click the "Create robot" button in the tester.
2. Give it a name.
3. Select a robot from the list.
4. Click the accept button.
Now go inside the robot:
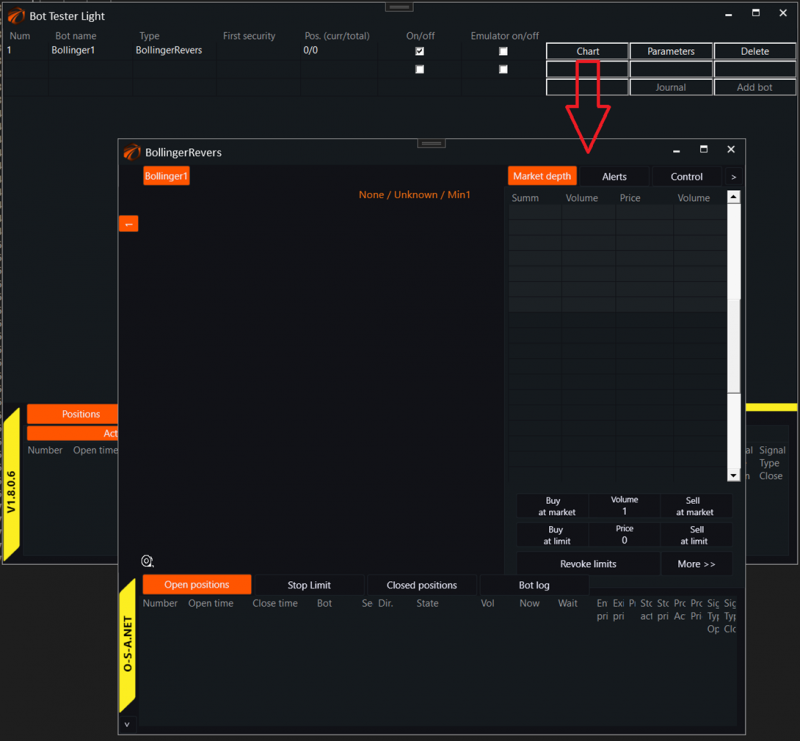
Next:
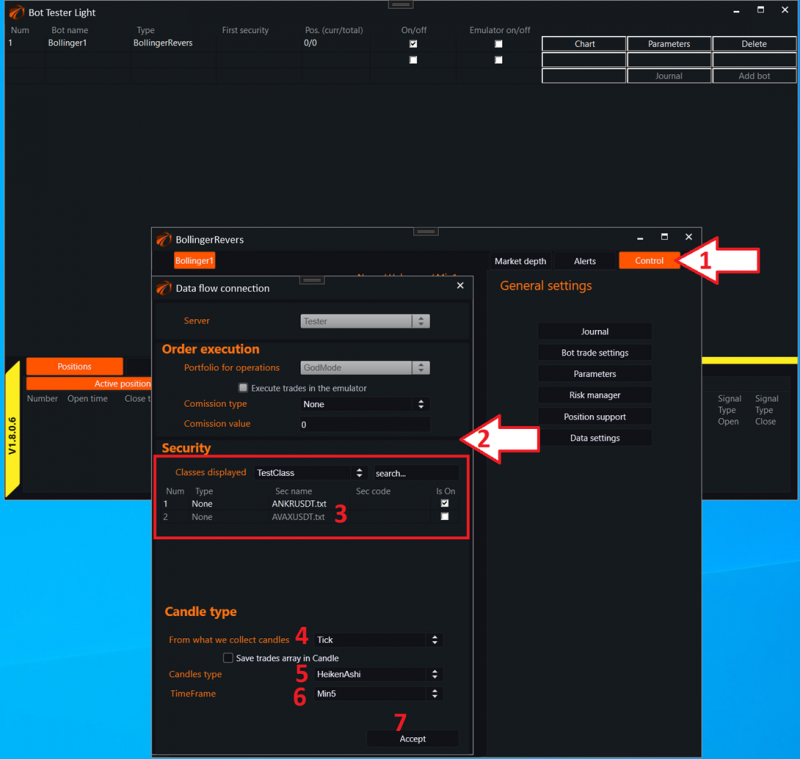
1. Go to the "Control" tab.
2. Access data settings.
3. Choose a security.
4. Do not forget to switch the candle build type to Tick.
5. The candle build type can be chosen from any available. In this case, we chose HeikenAshi.
6. Any timeframe.
7. Click on the "Accept" button.
After that, by enabling market emulation, we will see that the data is flowing:
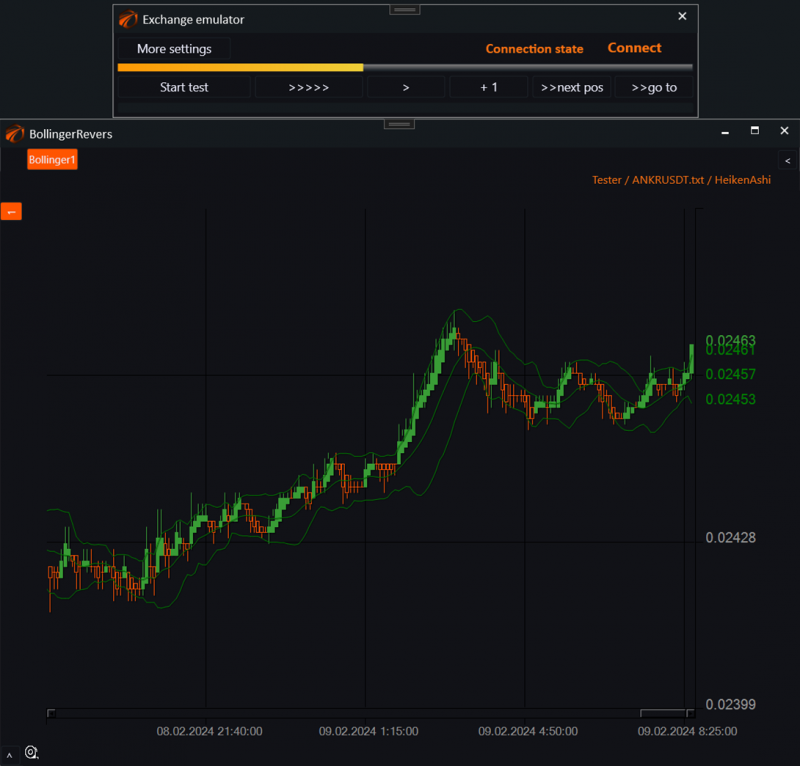
Good luck with your algorithms!
If something didn't work out or if you have any questions, please feel free to reach out to our support chat.