Namespaces (using directives).
.")
The first thing you will see when you open OsEngine is the Solution Explorer with folders on the right. The key at this moment is not to be intimidated.
These folders contain the entire project, but for creating robots, you only need to know about a few of them. Essentially, these folders can be referred to as "Namespaces" that you should learn to use.
Namespaces are a way to group code that allows for organizing a logical and convenient structure within the project. Typically, types related by a common concept and similar functionality are contained within a common namespace.
During the development of trading robots in OsEngine, it is important to have a general understanding of where various entities are stored within the project. Let’s look at the basic namespaces that will definitely come in handy for you.
Part 1: Theory
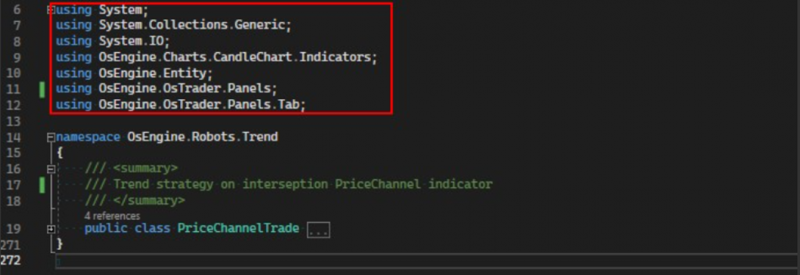
Let's start by examining what a namespace is in the source code, using the example of almost any robot available on the platform. In the code file, the namespace is defined using the namespace keyword:

In conclusion, a namespace consists of opening and closing brackets in a file, within which classes are contained.
This convention is used in almost all programming languages to allow us (programmers) to group certain classes together. Additionally, it enables the quick addition of a lot of code (classes) from other namespaces into different classes.
When you write code for a class (or a robot in OsEngine), you can import the necessary namespaces using the using directive at the beginning of the robot class:
An alternative to adding namespaces at the top of the file is to use the desired namespace while declaring a variable. However, in this case, you would need to know the project by heart, which can be a bit challenging:

Part 2: What You Definitely Need to Know About Namespaces in OsEngine.
Let’s take a look at the namespaces that you will definitely need when creating robots.
1. Entity
This namespace contains primitives commonly used in robots:
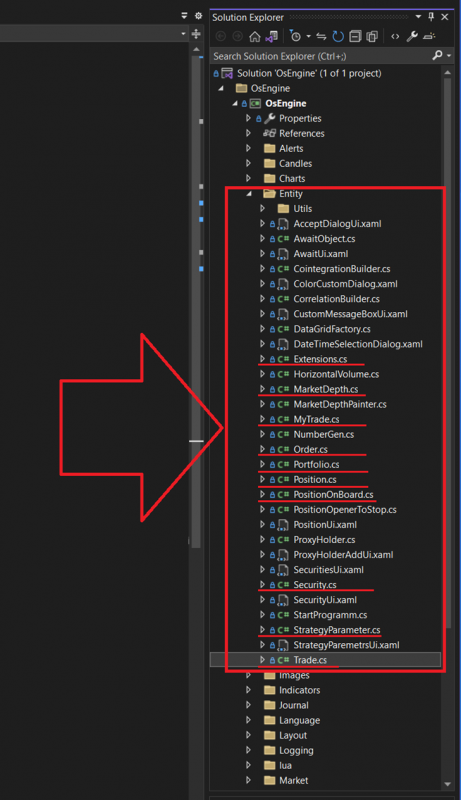
1. Extensions – extensions and specific mathematical operations.
2. MarketDepth – order book.
3. MyTrade – my trade. The result of matching two orders in the market.
4. Order – order… or application. However you prefer.
5. Portfolio – trade portfolio.
6. Position – the robot's position.
7. PositionOnBoard – position within the portfolio.
8. Security – trading instrument.
9. StrategyParameter – strategy parameters and everything related to it.
10. Trade – transaction. A single entry in the trade history.
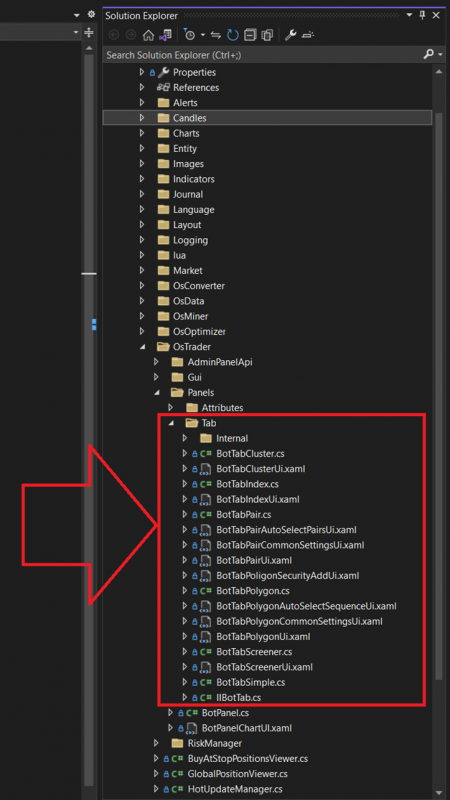
2. OsTrader.Panels
Contains the basic infrastructure for robots:
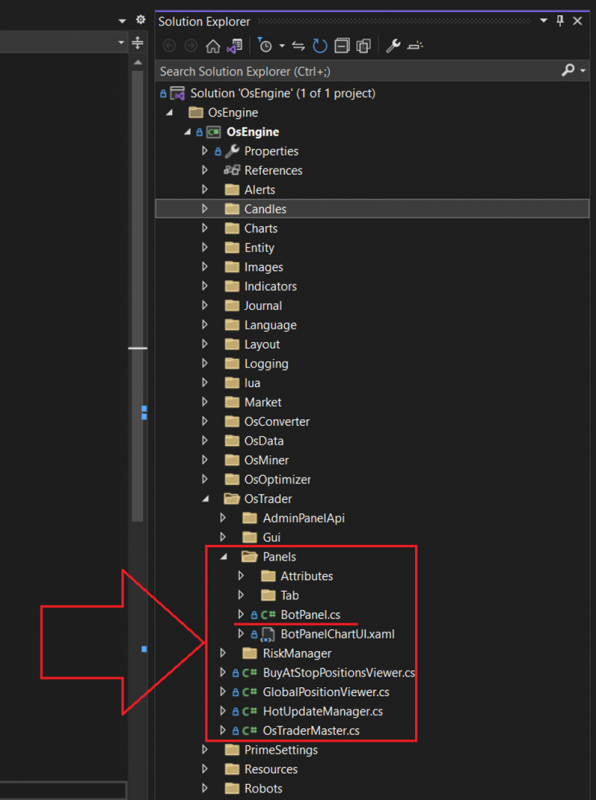
BotPanel – the interface for all robots. By inheriting from this, any class becomes a robot.
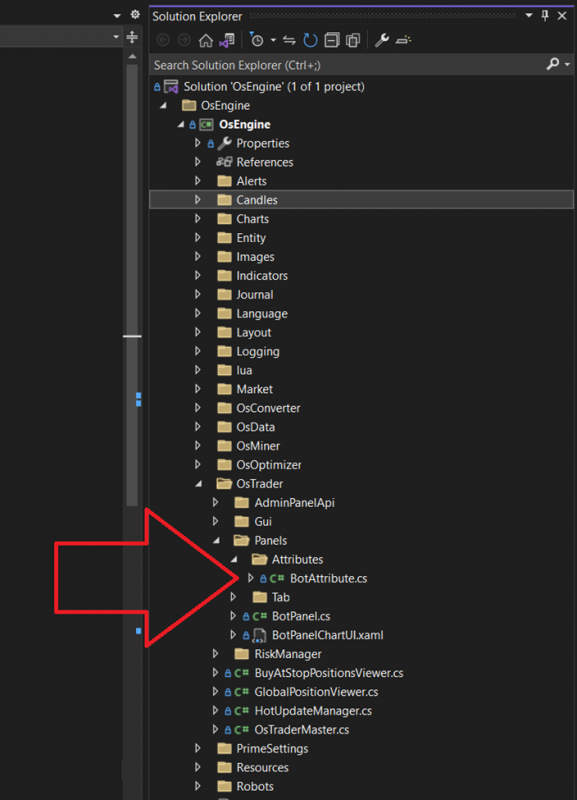
3. OsTrader.Panels.Attributes
A namespace with a single class that simplifies robot creation through attributes. Don't worry, you'll understand why this is useful soon:
4. OsTrader.Panels.Tab
This namespace contains all the sources available in OsEngine. You will also need to add it to every robot:
Part 3: Where to Find Example Robots
Of course, your first instinct will likely be to look at examples. Within the project, they are located here:
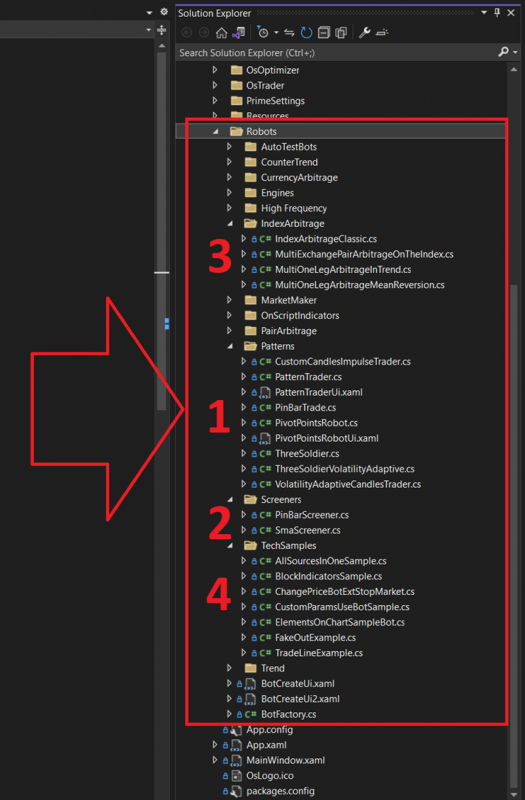
Robots are in the project under the Robots folder. Here’s the order we recommend:
1. Pattern-based Robots. There are great series of posts discussing what they are and why they are used, along with explanations about candlesticks.
2. Screeners. Robots for simultaneously trading dozens of securities. This is something you'll definitely want at some point.
3. Index Arbitrages. Examples of how to trade based on an index. There’s also a good series of articles on this topic.
Happy coding!