Alerts in OsEngine.

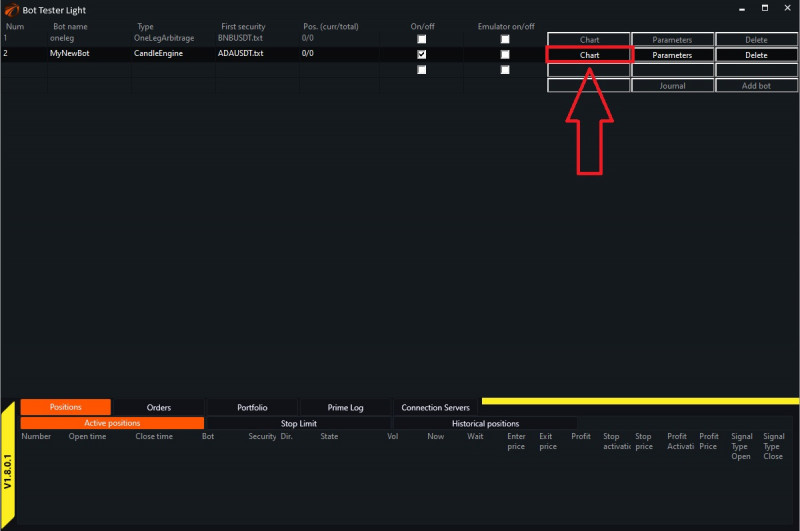
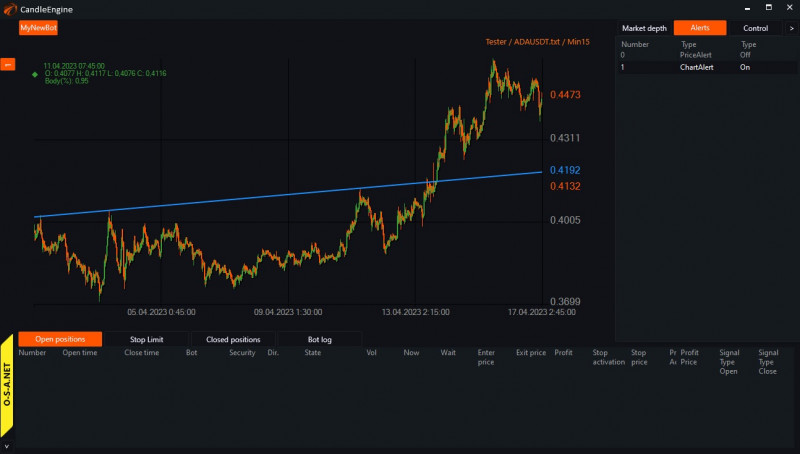
In OsEngine, there is a possibility to set lines and attach alerts to them. To do this, in the main menu window «Tester Light» or «Bot Station Light», click on «Chart».
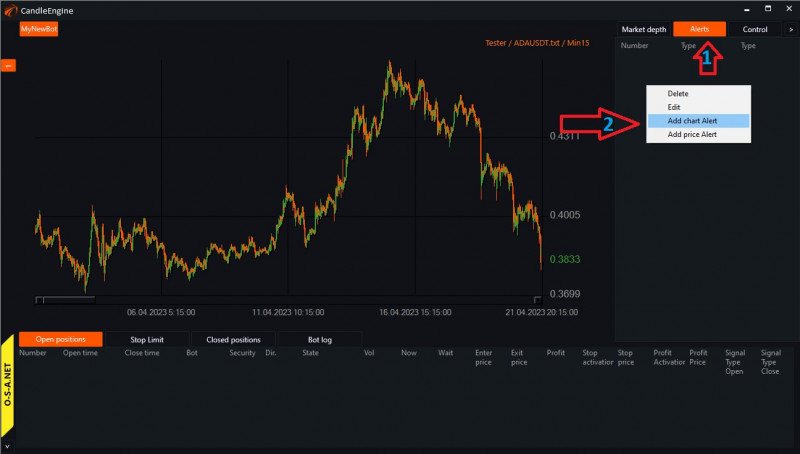
Then click on «Alerts».
There are 2 types of alerts:
- «Chart Alert».
- «Price Alert».
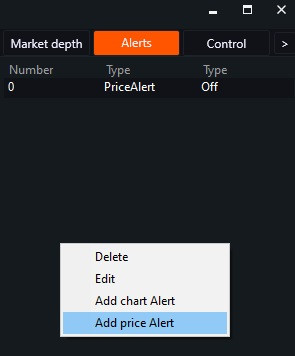
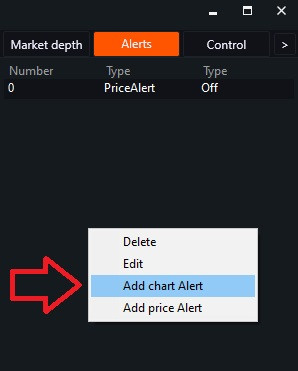
Add price Alert.
The signal is triggered when the price reaches the level specified by the user.
To create an alert, right-click on the left panel and select «Add Price Alert»:
Important!
- Alerts can only be set on a candlestick chart.
- If a robot panel is active, alerts do not replace its logic. They work independently of the robot's logic.
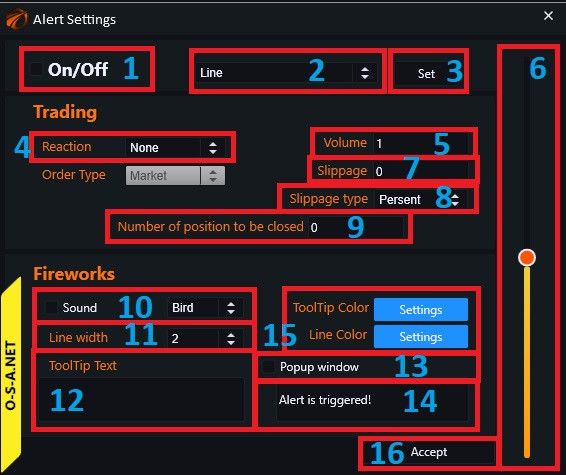
This is what the alert creation window looks like:
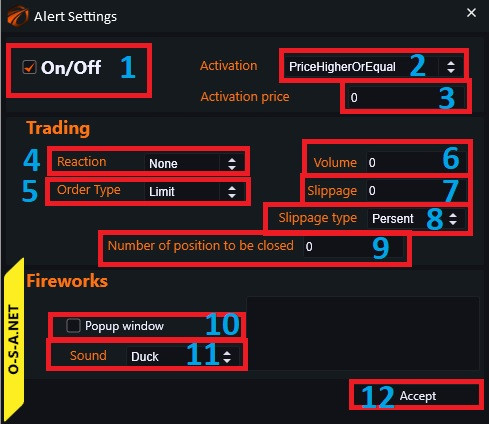
- «On» (check) / «Off» (uncheck) to enable or disable the alert triggering.
- «Activation» - a dropdown menu to select the type of activation:
- Click on the arrows and choose the desired activation type.
- «PriceLowerOrEqual» - price is lower or equal.
- «PriceHigherOrEqual» - price is higher or equal.

3. Set the price for the selected type to reference.
4. «Reaction»:

- «None» - no action taken.
- «Buy» - buy.
- «Sell» - sell.
- «CloseAll» - close all positions at market price.
- «CloseOne» - close the position with the specified number in column 9.
- «Modificate» - modify.
- «OpenNew» - open a new position.
- «ReloadProfit» - modify take profit level.
- «ReloadStop» - modify stop loss level.
5. «Order Type» - order type when opening a position:
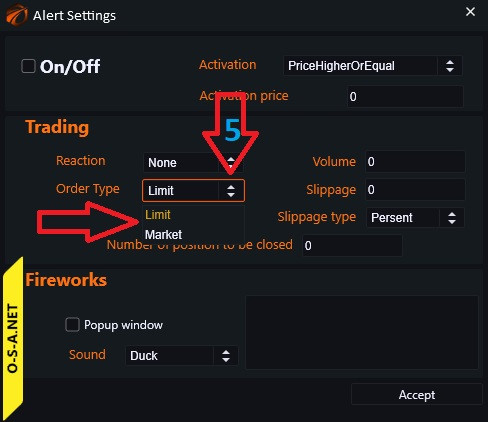
Click on the arrows and select the order type:
- «Market» - execute at any price.
- «Limit» - execute at a specific price.
6. «Volume» - volume of the trade to be opened.
7. «Slippage» - set at your discretion (can leave as 0).
8. «Slippage type» - a selection window pops up:
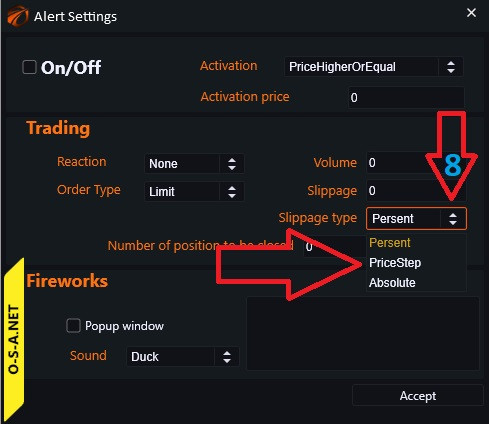
- Persent - in percentage;
- PriceStep - in price steps;
- Absolute - in absolute terms;
9. Position to be closed number. In case the CloseOne reaction is selected.
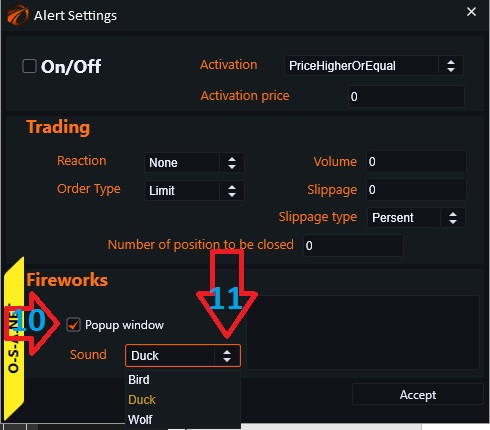
10. If you want the alert window to pop up when triggered, check this box.
11. Sound signal settings.
12. Optionally, write the name of our notification here.
The notification window looks as follows (may vary slightly depending on the settings).
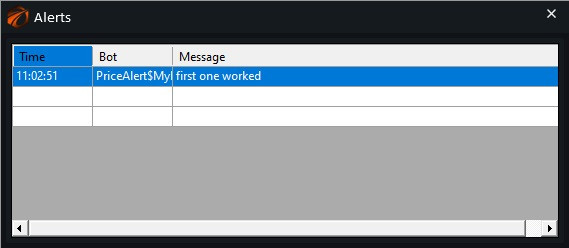
Chart Alert.
It is created in a similar way to the previous alert
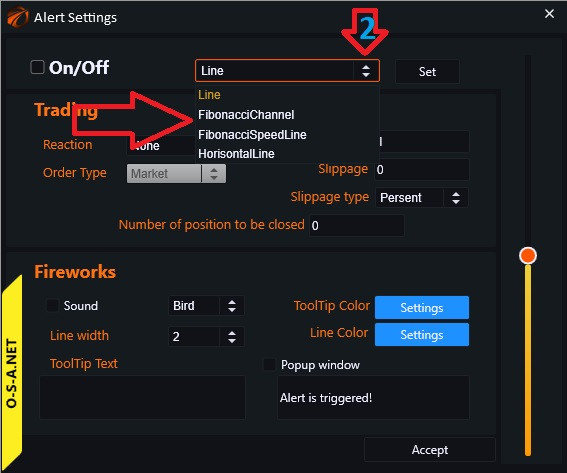
and has the following settings window:
1. «On» (check) / «Off» (uncheck) to enable or disable the alert triggering.
2. Dropdown menu to select the type of alert - click on the arrows and choose the type.
3. After clicking the «Set» button, you need to click on the chart to set two points for the alert line:
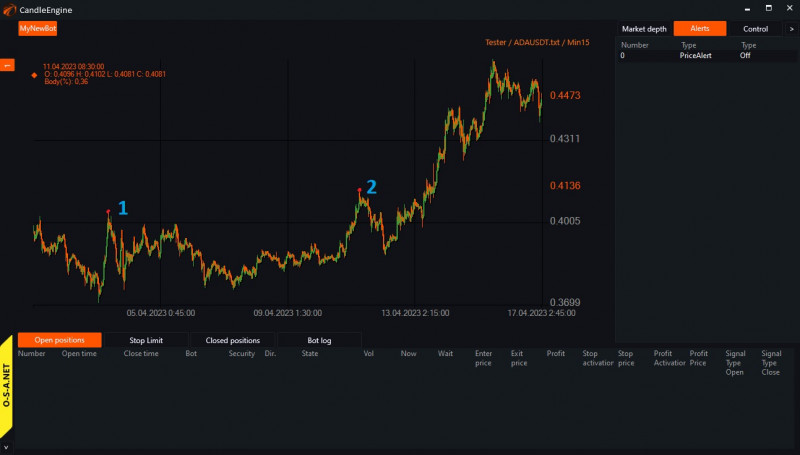
A line appears:
4. Then choose the reaction type by clicking the arrows:
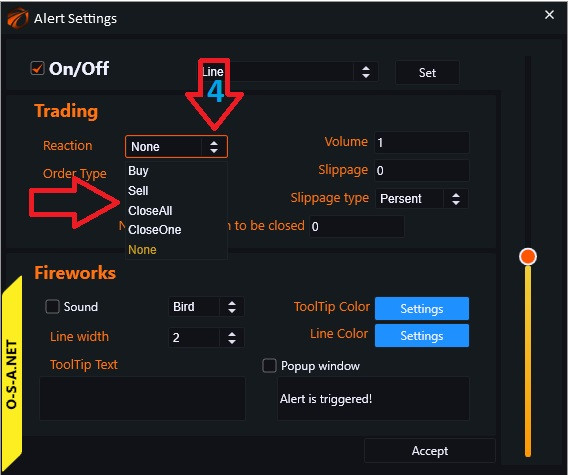
- «None» - no action taken.
- «Buy» - buy.
- «Sell» - sell.
- «CloseAll» - close all positions at market price.
- «CloseOne» - close the position with the specified number in column 8.
5. «Volume» - volume of the trade to be opened.
6. Slider to adjust the angle or width of the alert construction for «Fibonacci Speed Line» and «Fibonacci Channel» alerts.
7. «Slippage» - slippage from the best price for Limit orders.
8. Slippage type - a selection window pops up:
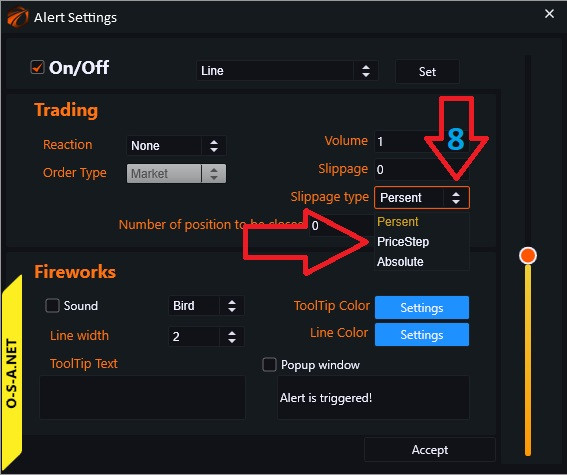
- Persent - in percentage;
- PriceStep - in price steps;
- Absolute - in absolute terms;
9. Position to be closed number. In case the CloseOne reaction is selected.
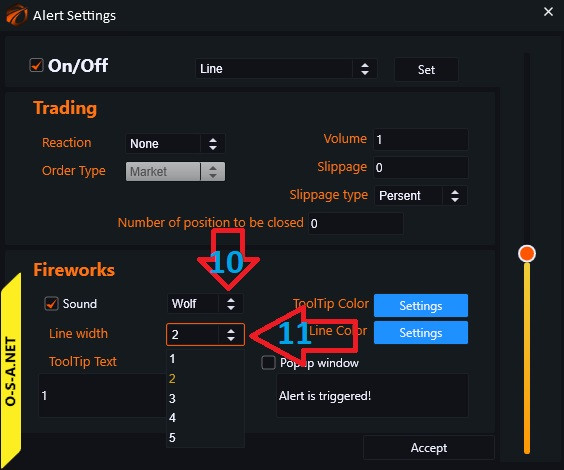
10. Select a sound. Check the box, click on the arrows, and choose according to your mood.
11. Click on the arrows and select the line width from the available options.
12. If there are multiple alerts, it can be convenient to number and label them.
13. Check the box if you want to view information about the trigger in a separate window.
14. Text label when triggered (can be modified).
15. You can customize the color of the label and line. Click on the «Customize» button and choose the desired color.
16. After completing all the settings, confirm your actions by clicking «Accept».
Happy trading!
If something didn't work out or if you have any questions, please write in the support chat, link.